

how to draw body positions
Eleventh Drawing Pose
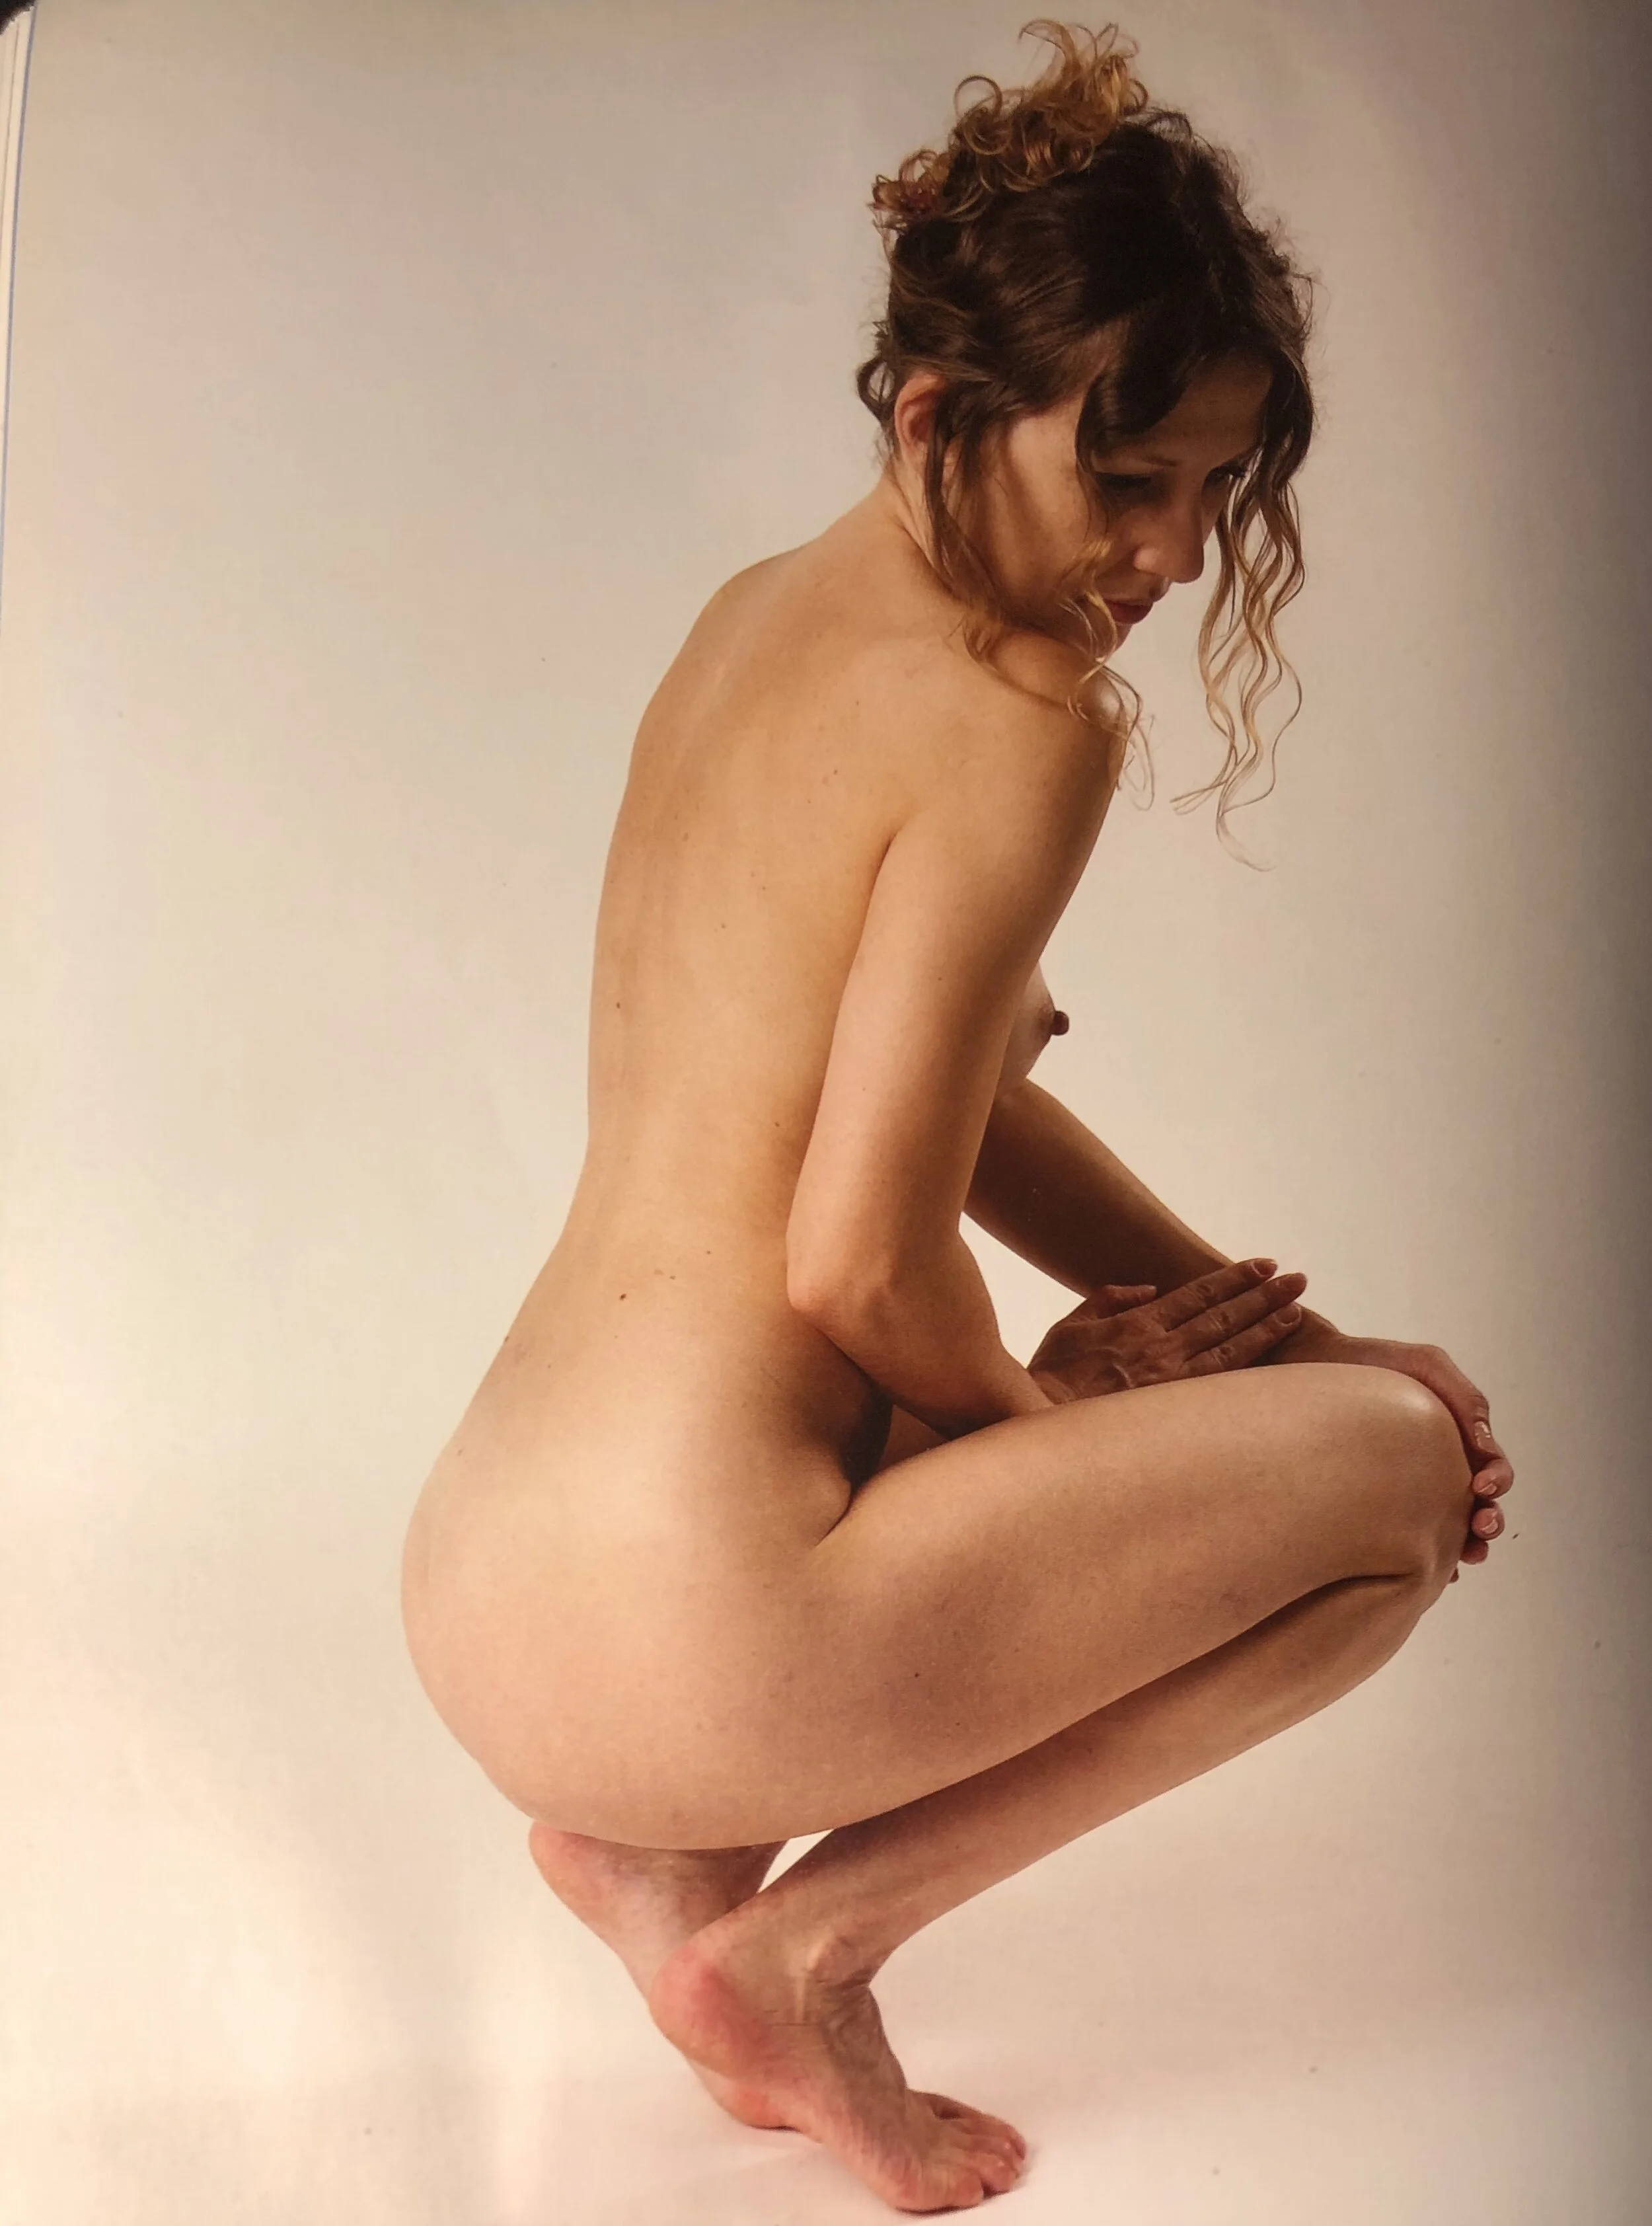
Reference from 'The Nude Female Figure' by Mark Edward Smith
Tenth Drawing Pose
Here is todays pose. Note that because of the side angle of her head and body, her head does appear to be out of proportion in this photo. Just another challenge :)
Hope you all enjoyed the first tutorial. I'll be uploading another one on Friday!
Reference from 'The Nude Female Figure' by Mark Edward Smith
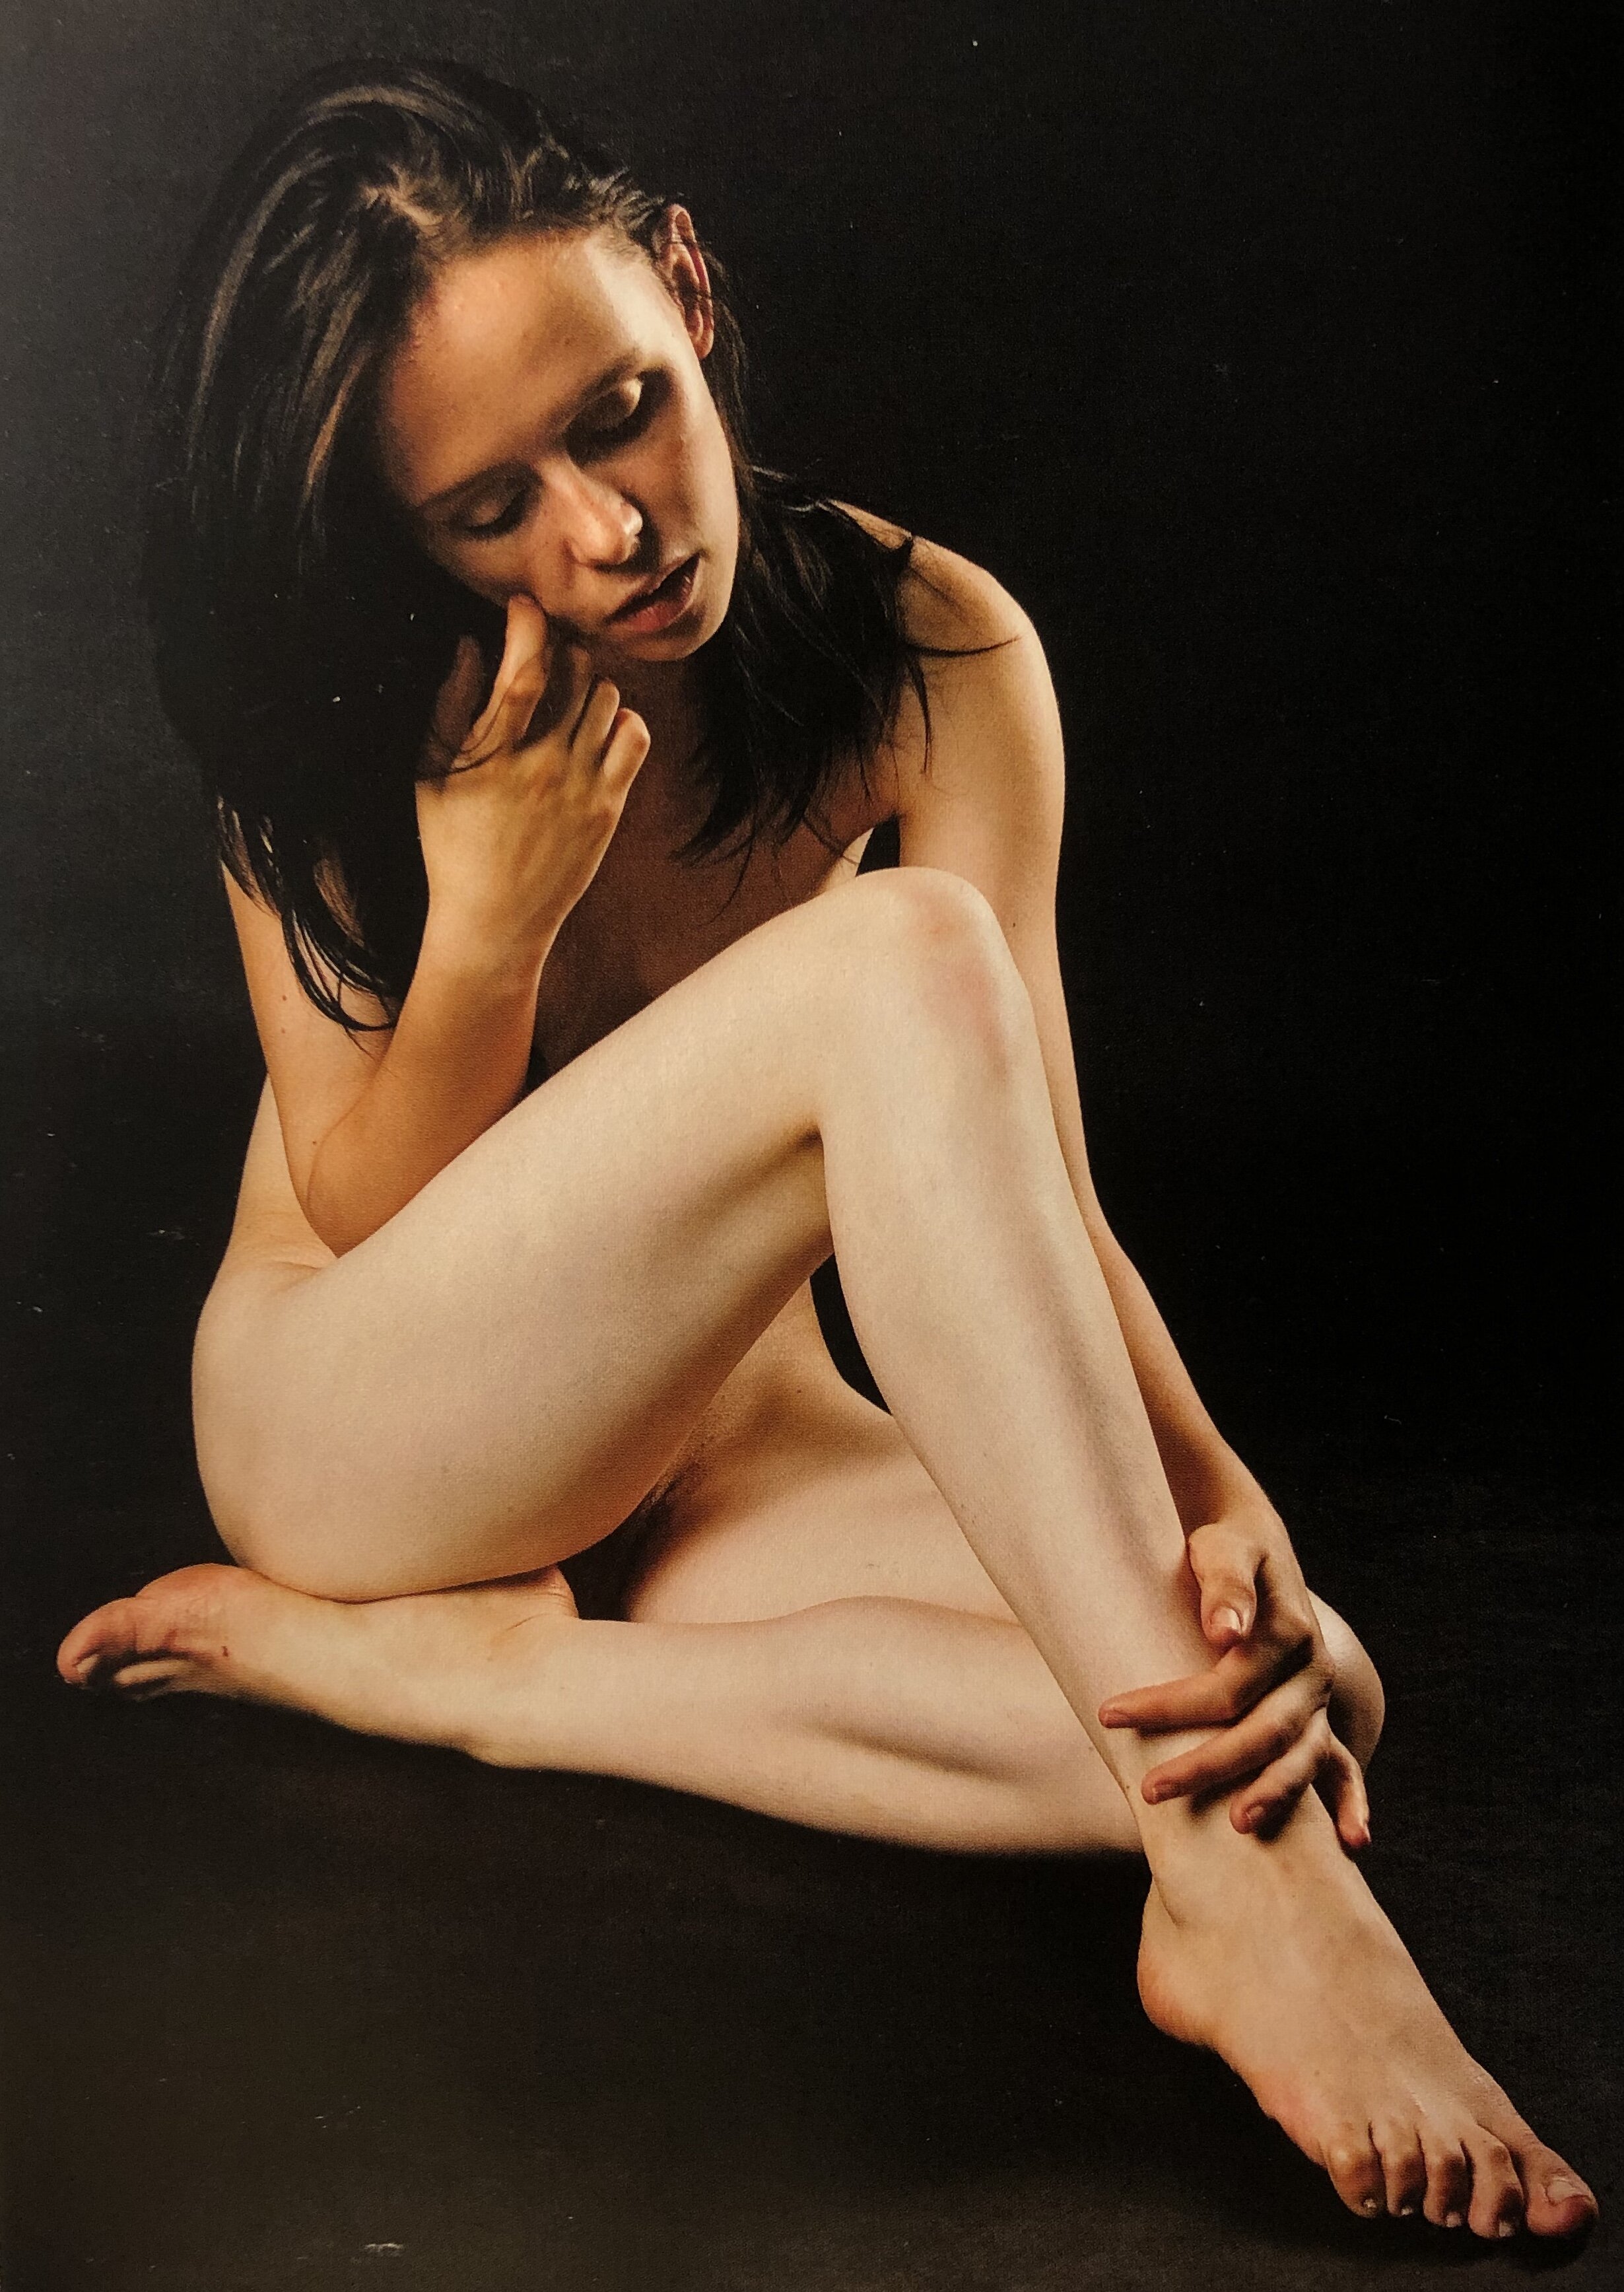
Ninth Drawing Pose
Reference for 'The Nude Female Figure' by Mark Edward Smith
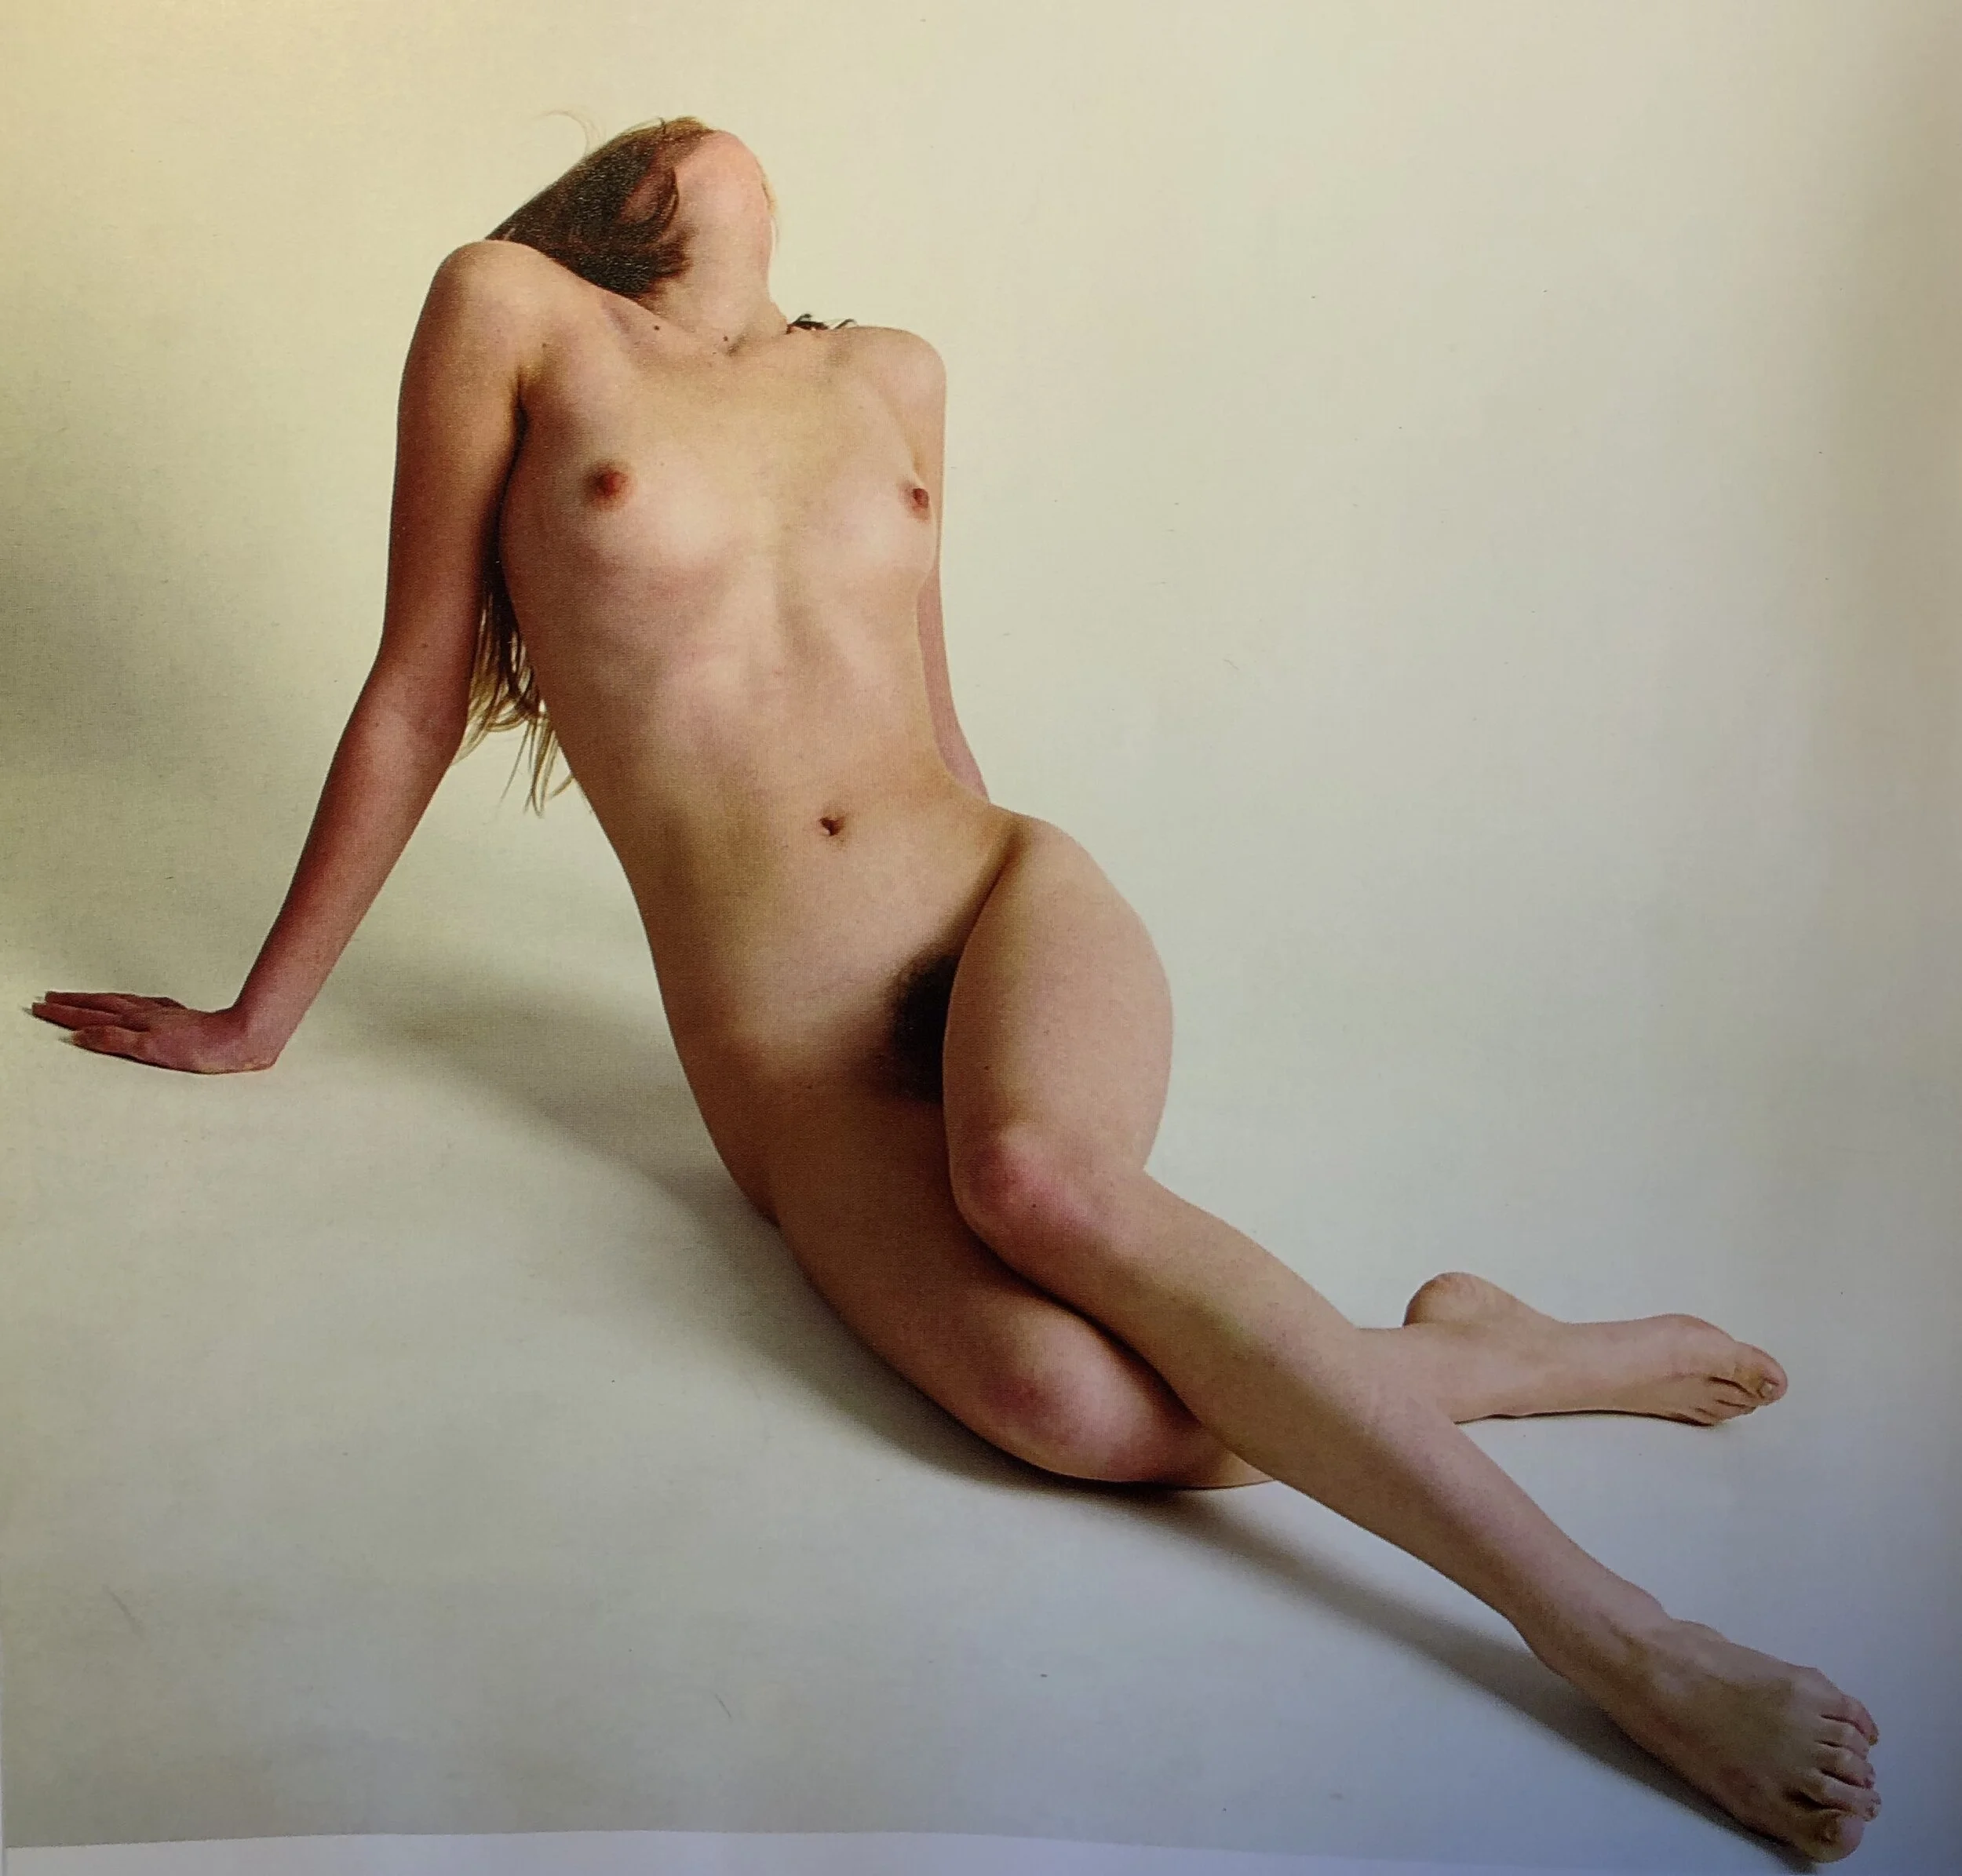
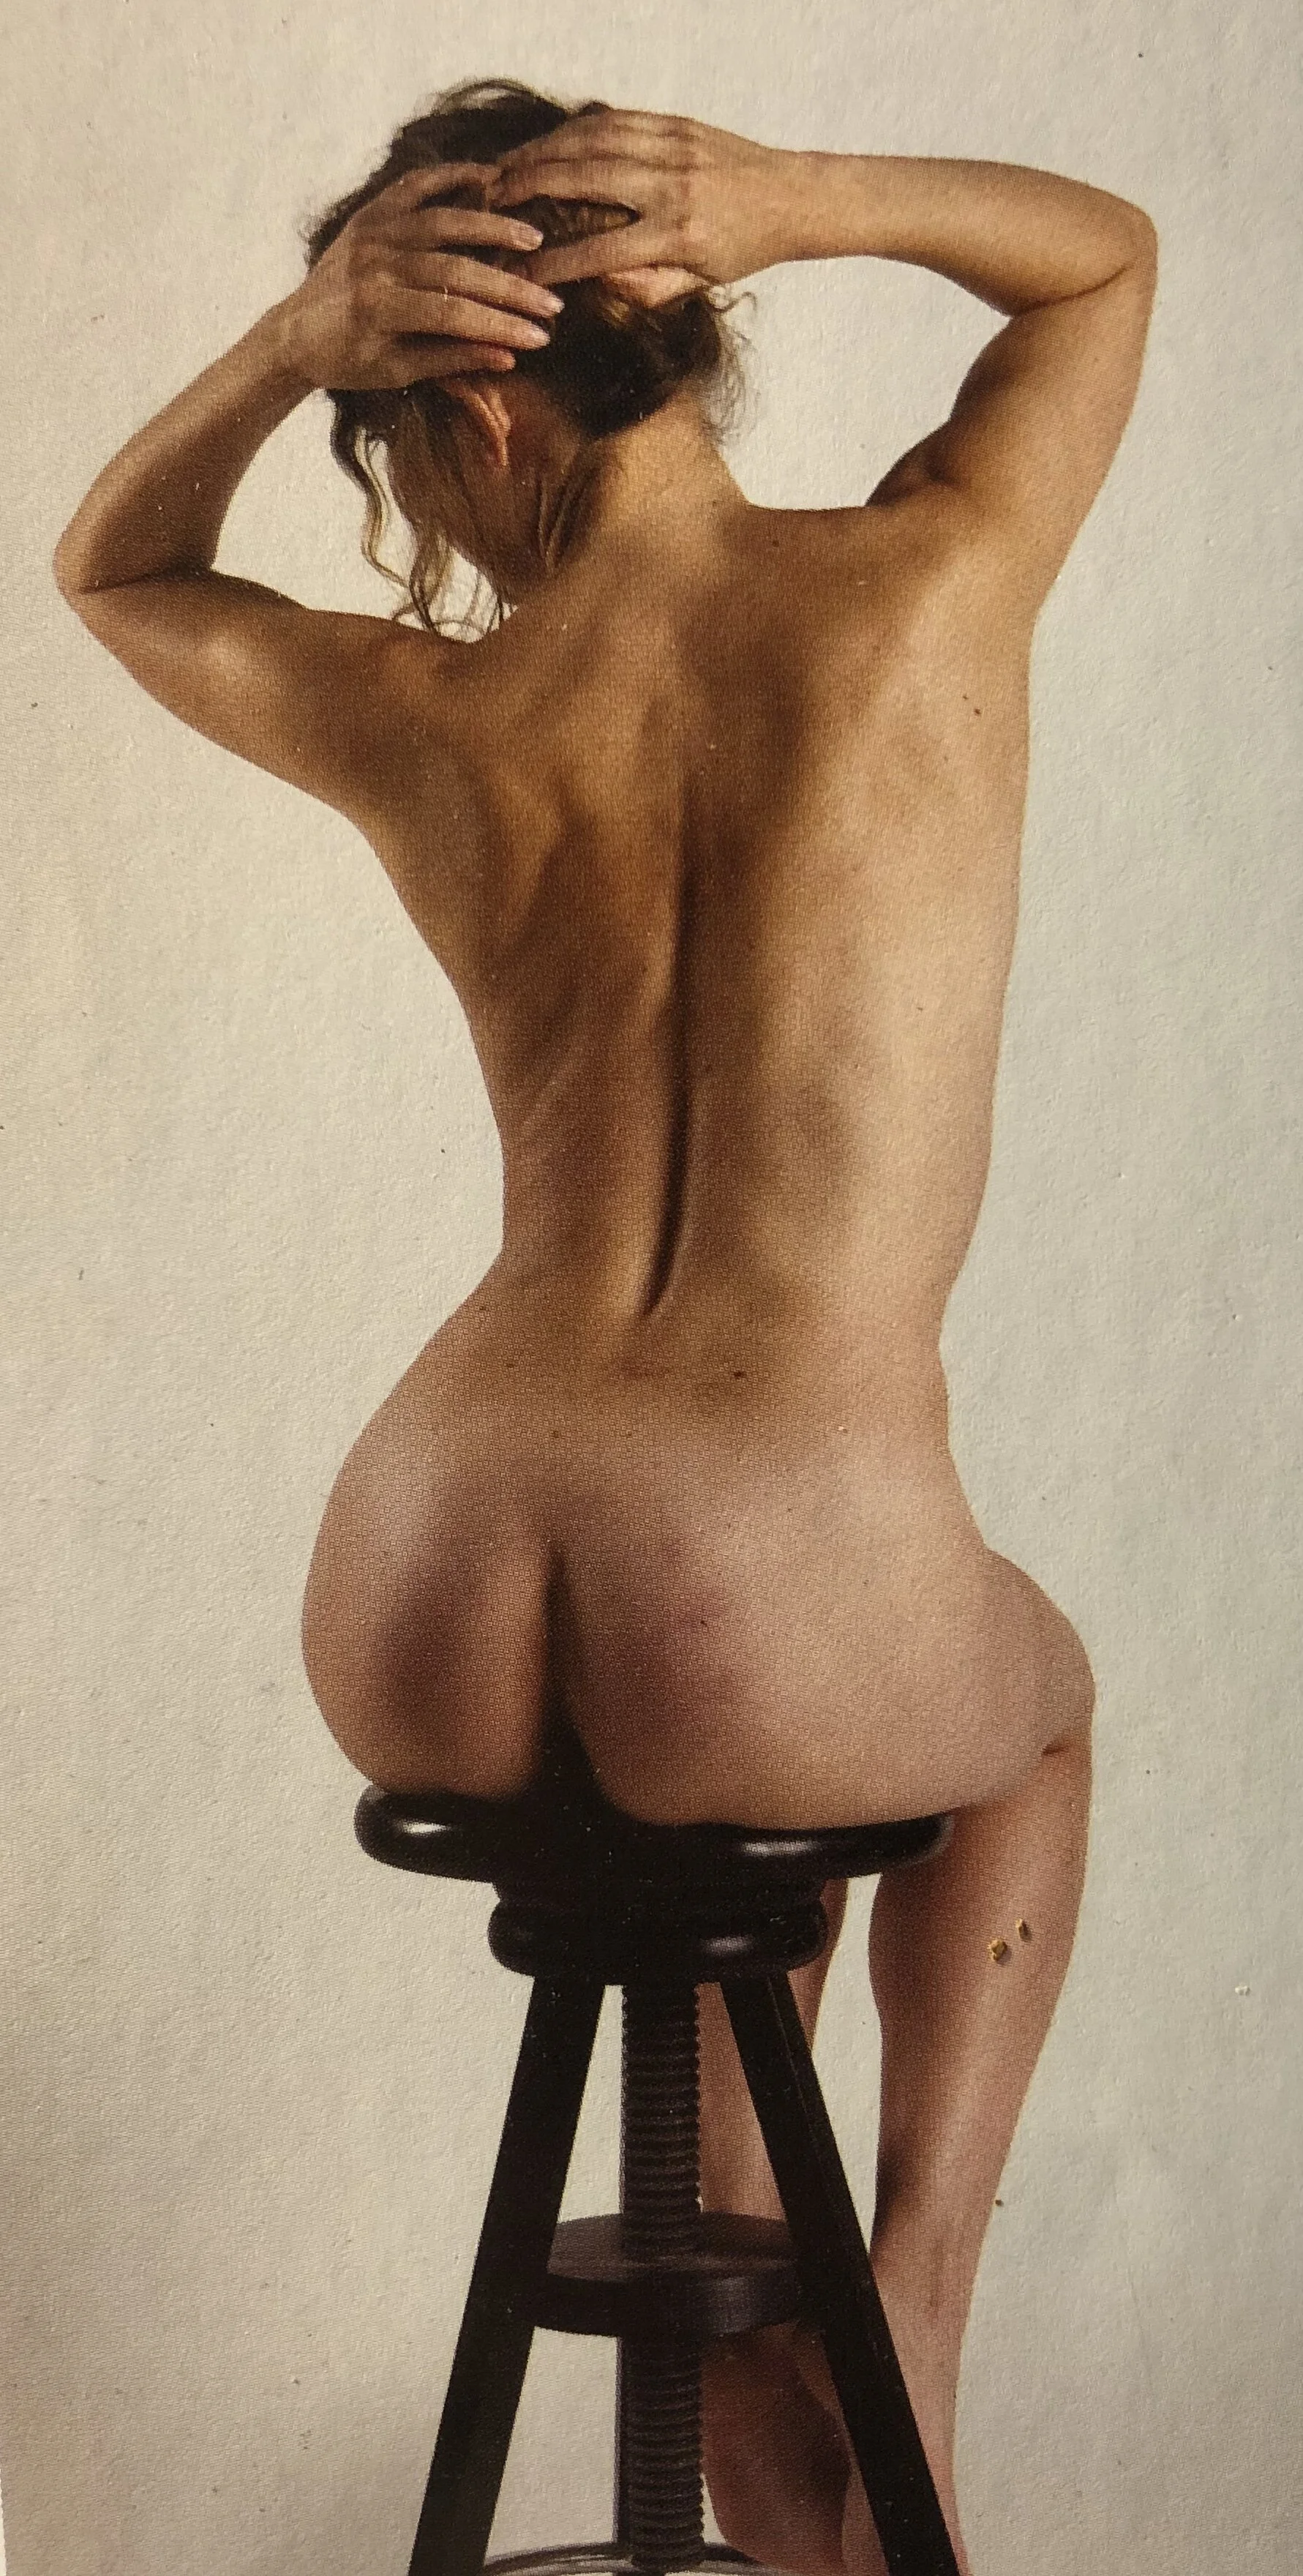
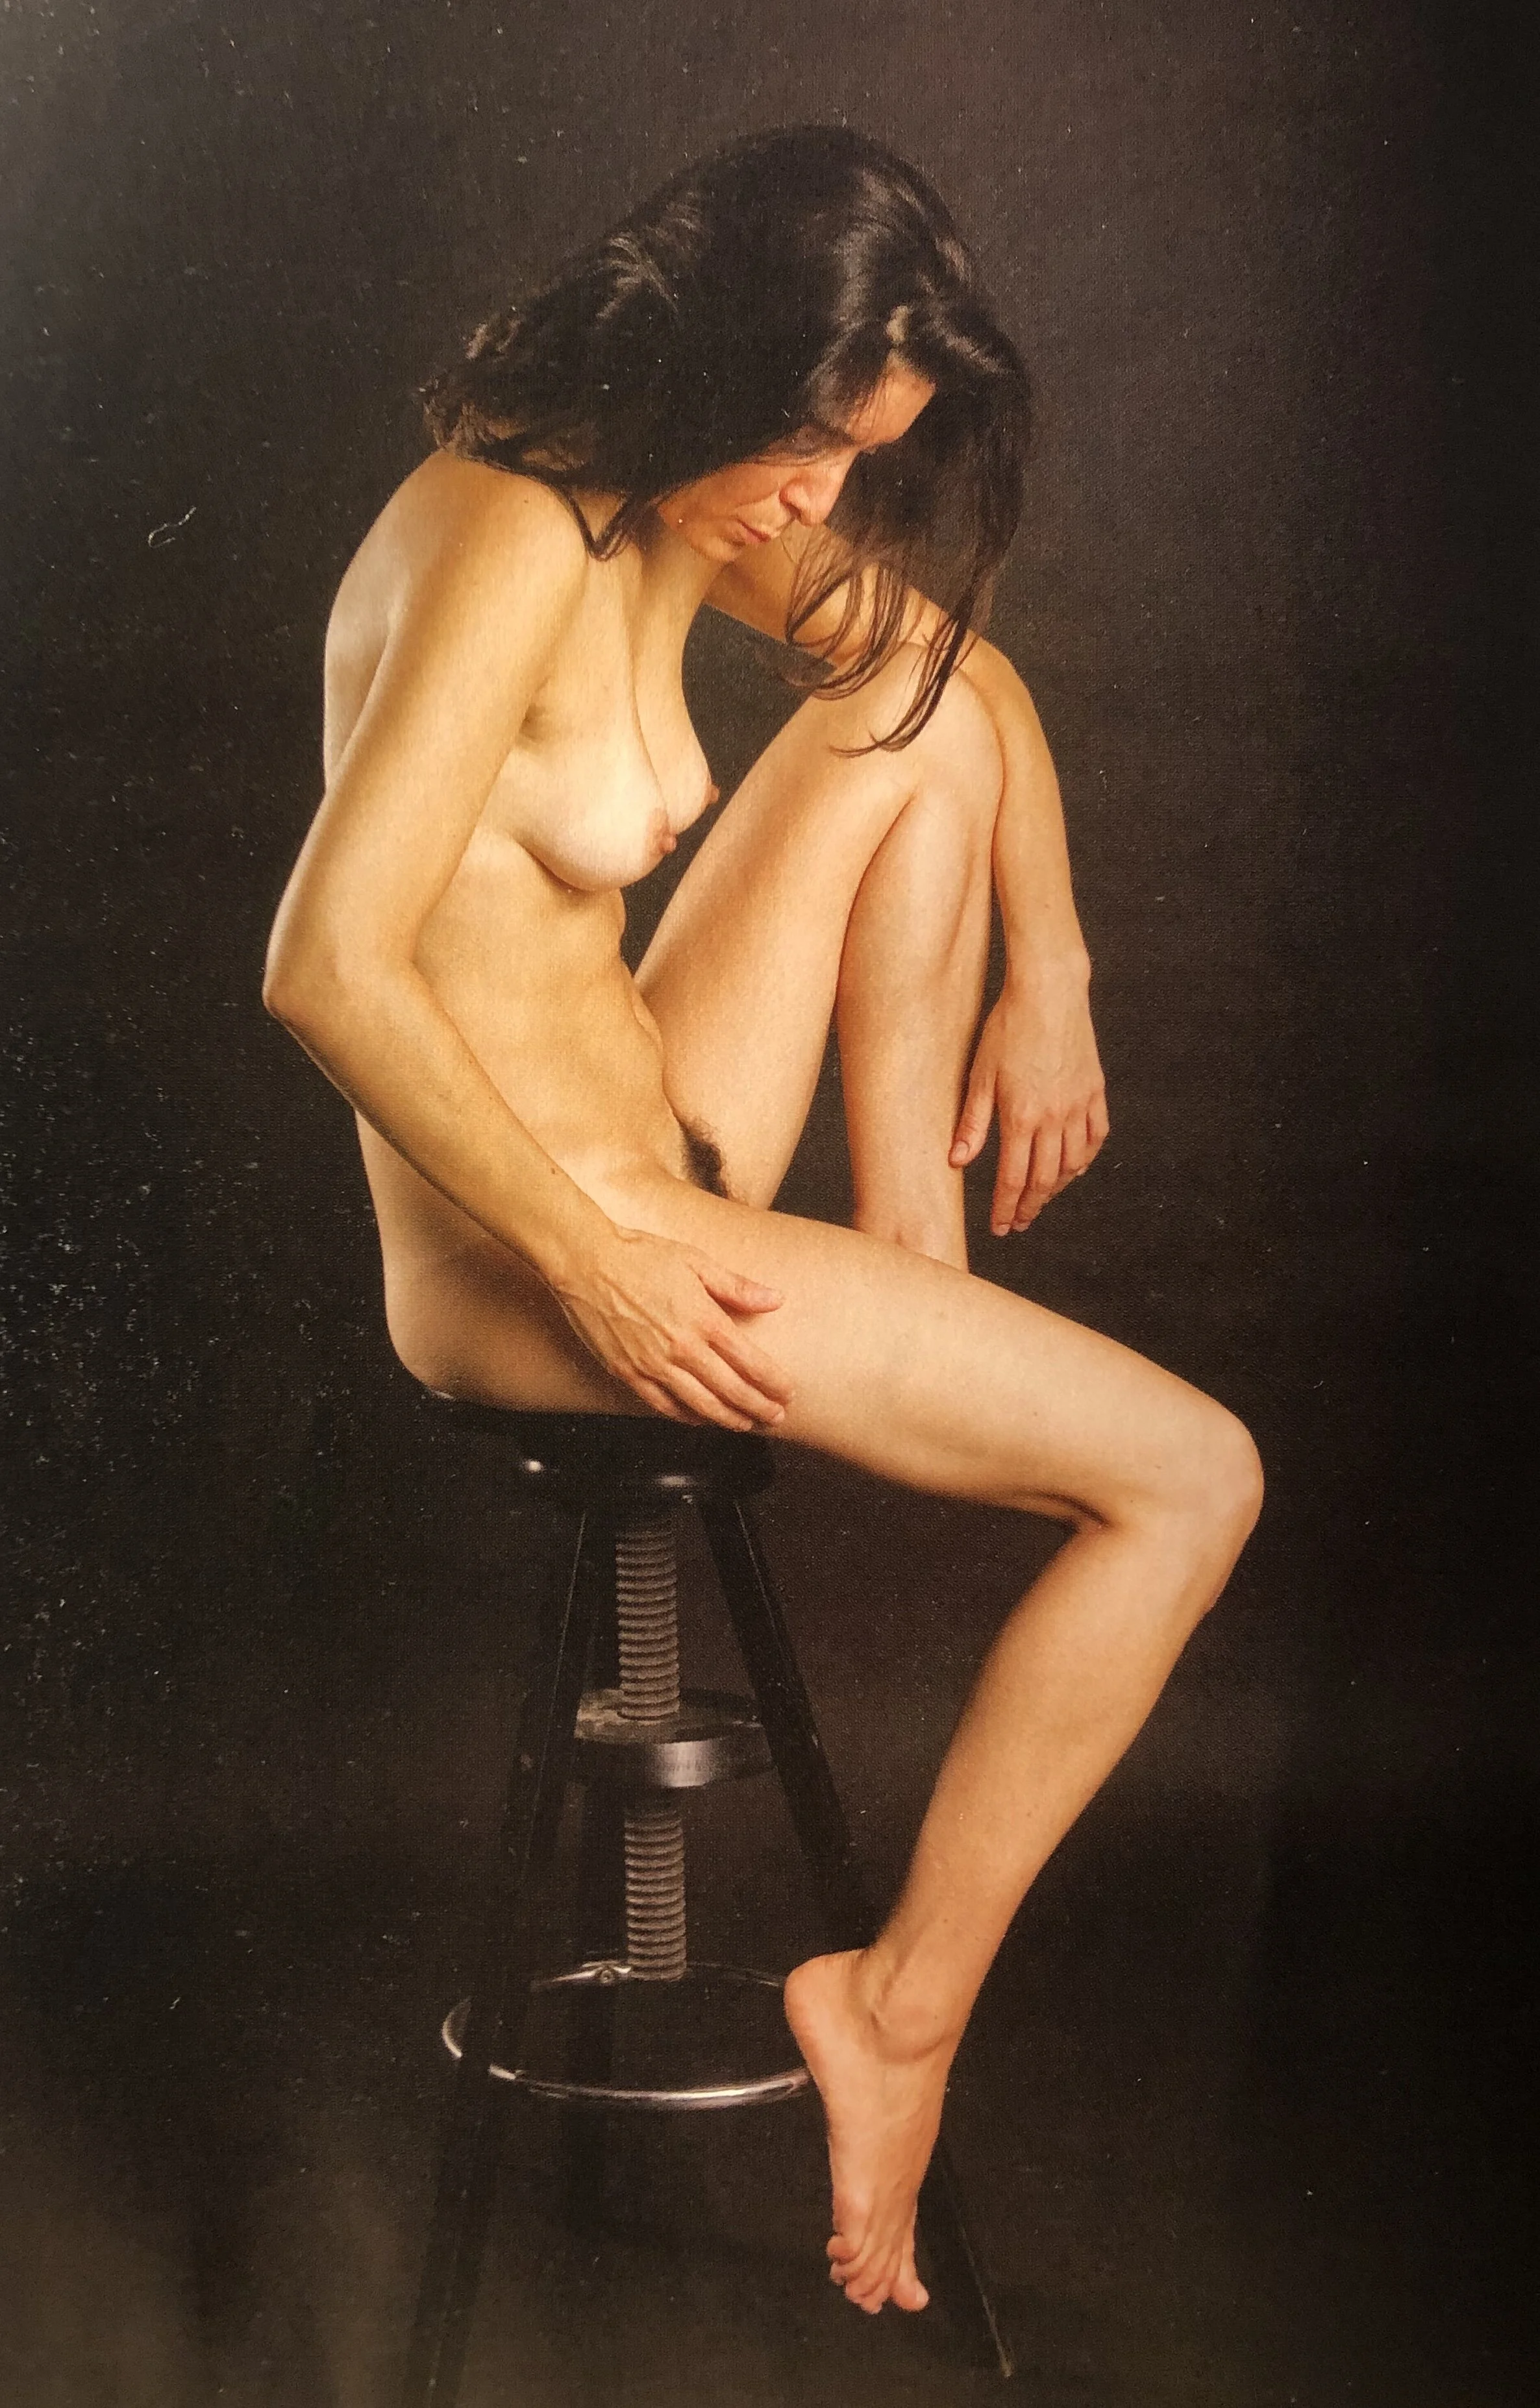
Eighth Drawing Pose
I'd say this pose is a little inspired by Botticelli's Venus.
If hands frighten you then take the time to draw hands on their own. Once you face your fear you will see they are just more shapes and lines! I suggest drawing your own hand over and over. Or even draw the hand from the image but on the side of the page or separate piece of paper.
Todays suggested soundtrack is by Lou Millar https://open.spotify.com/artist/5rFcUb2IXpFM8BiHgaQmBI?si=0KU044JfR4GzYXdFlst1-w
Reference image from 'The nude female figure' by Mark Edward Smith
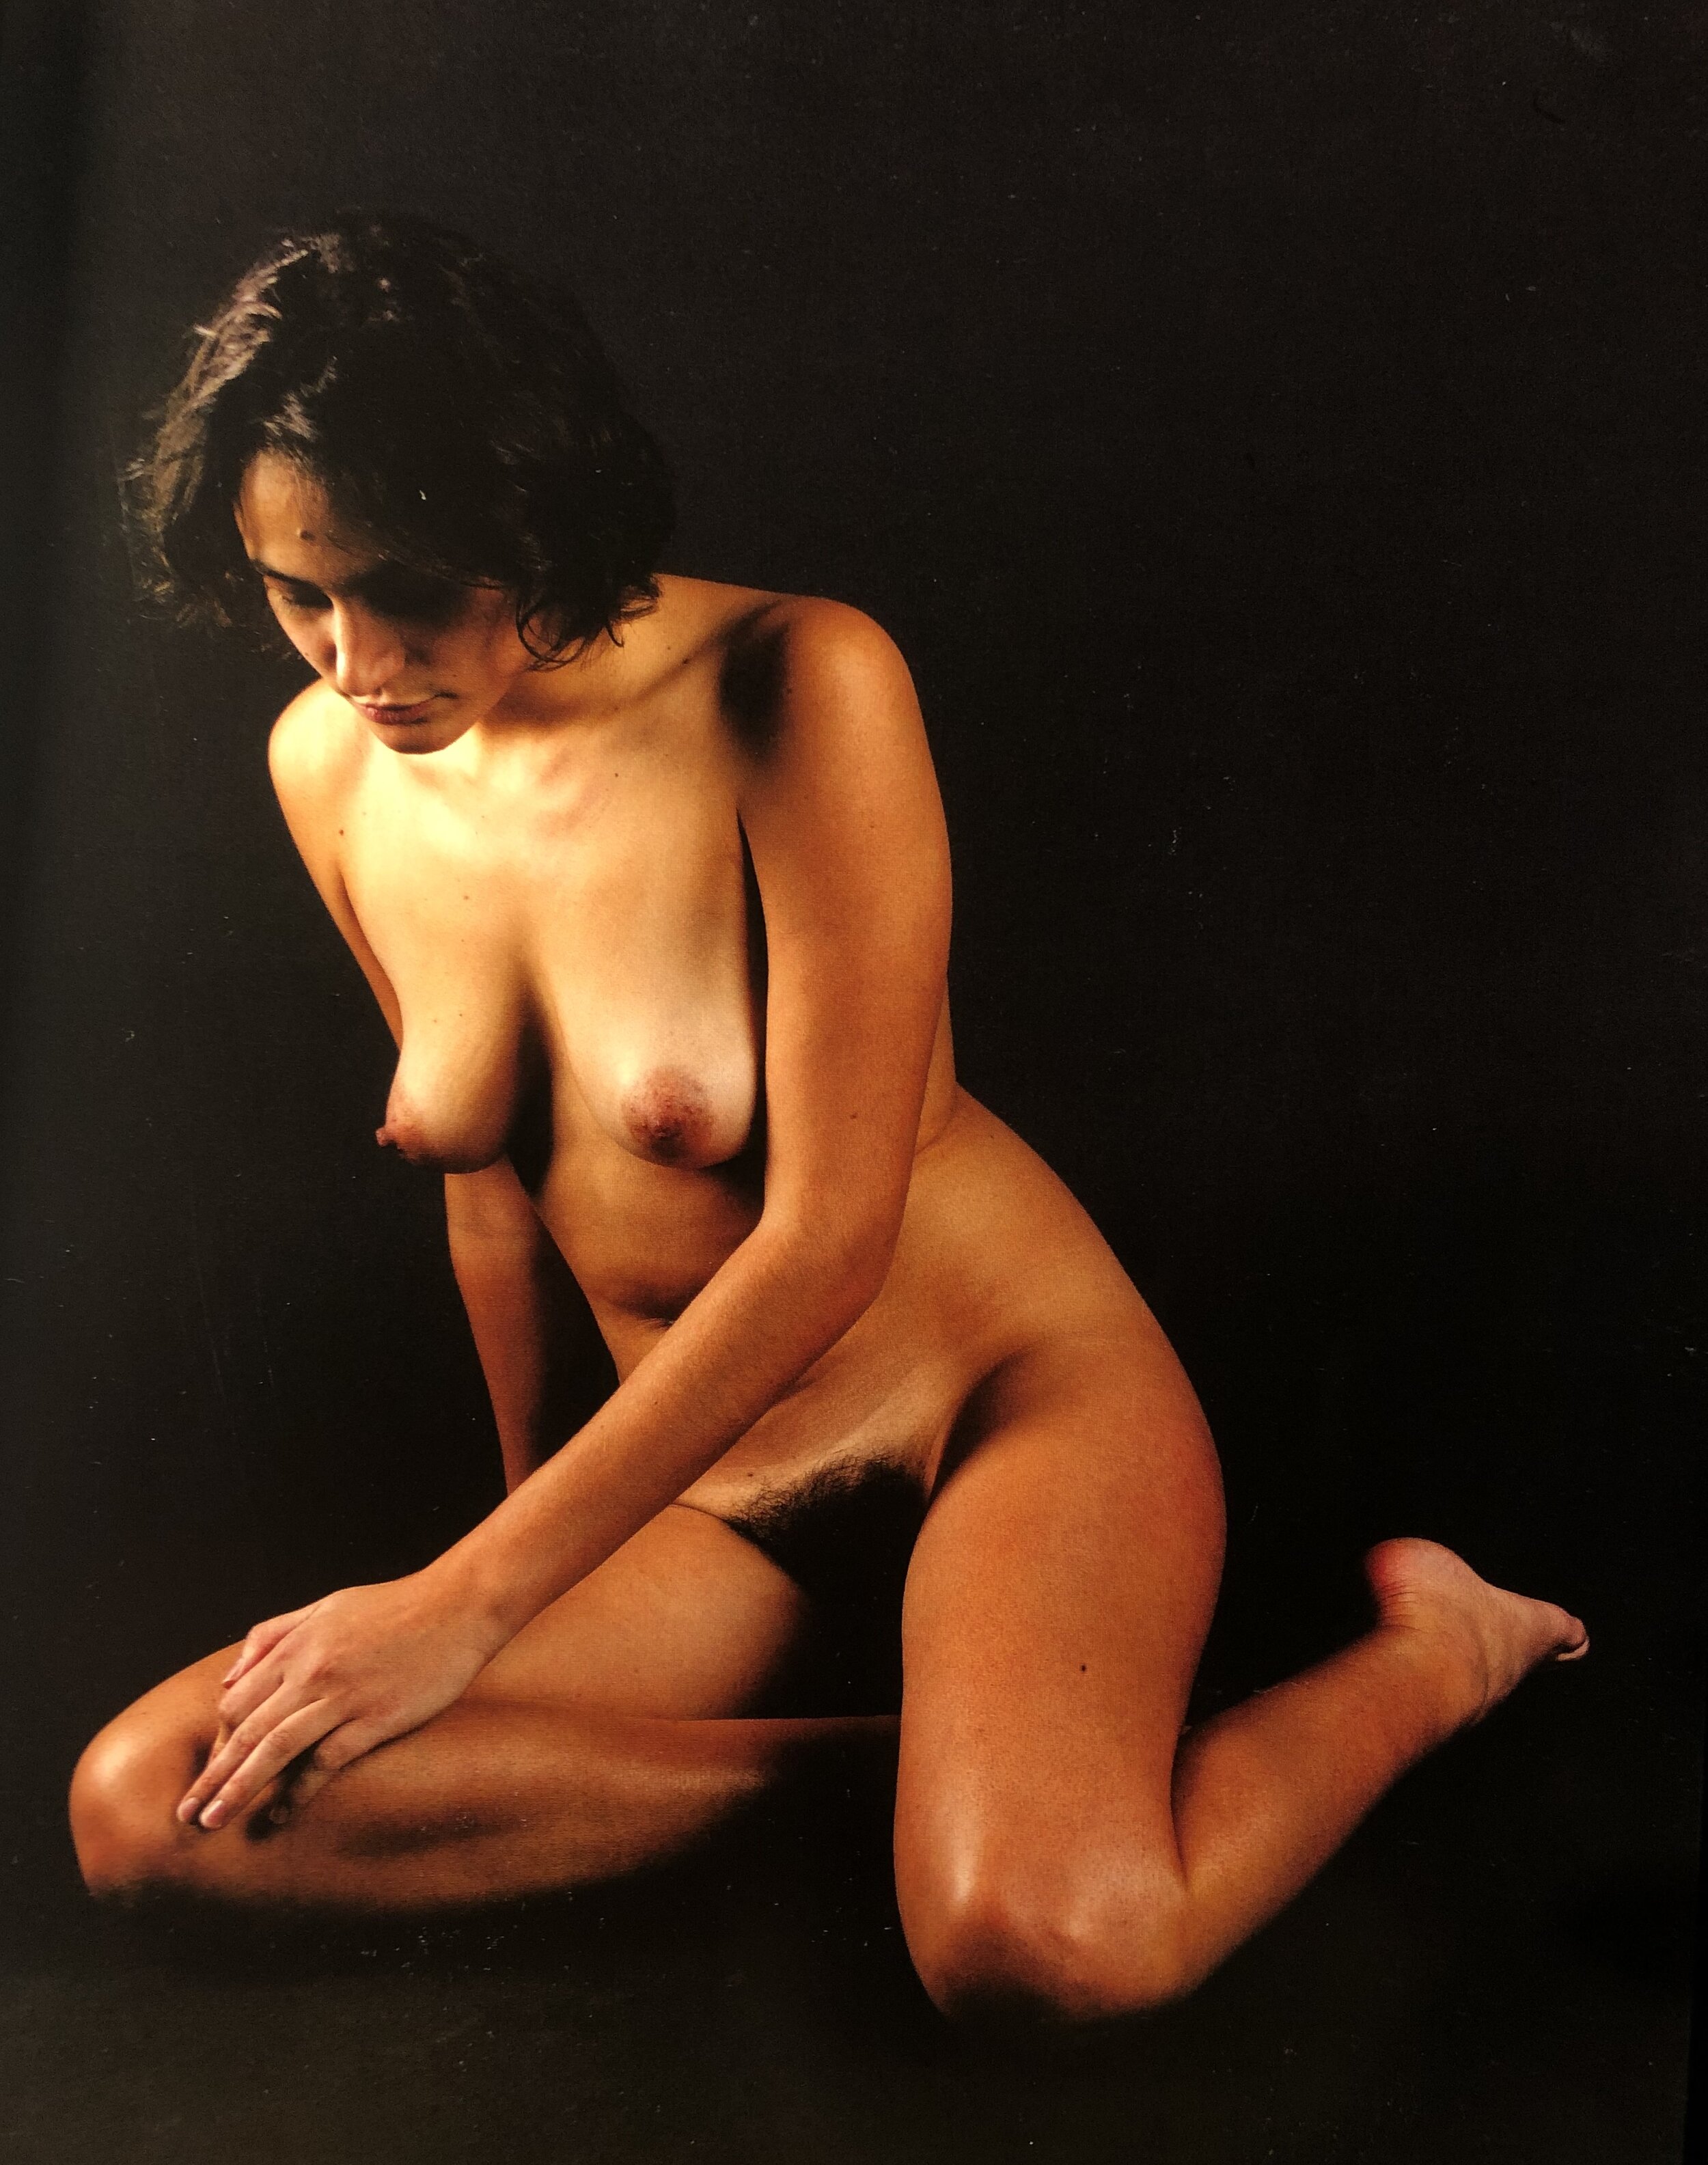
Seventh Drawing Pose
Reference image from 'The Nude Female Figure' by Mark Edward Smith
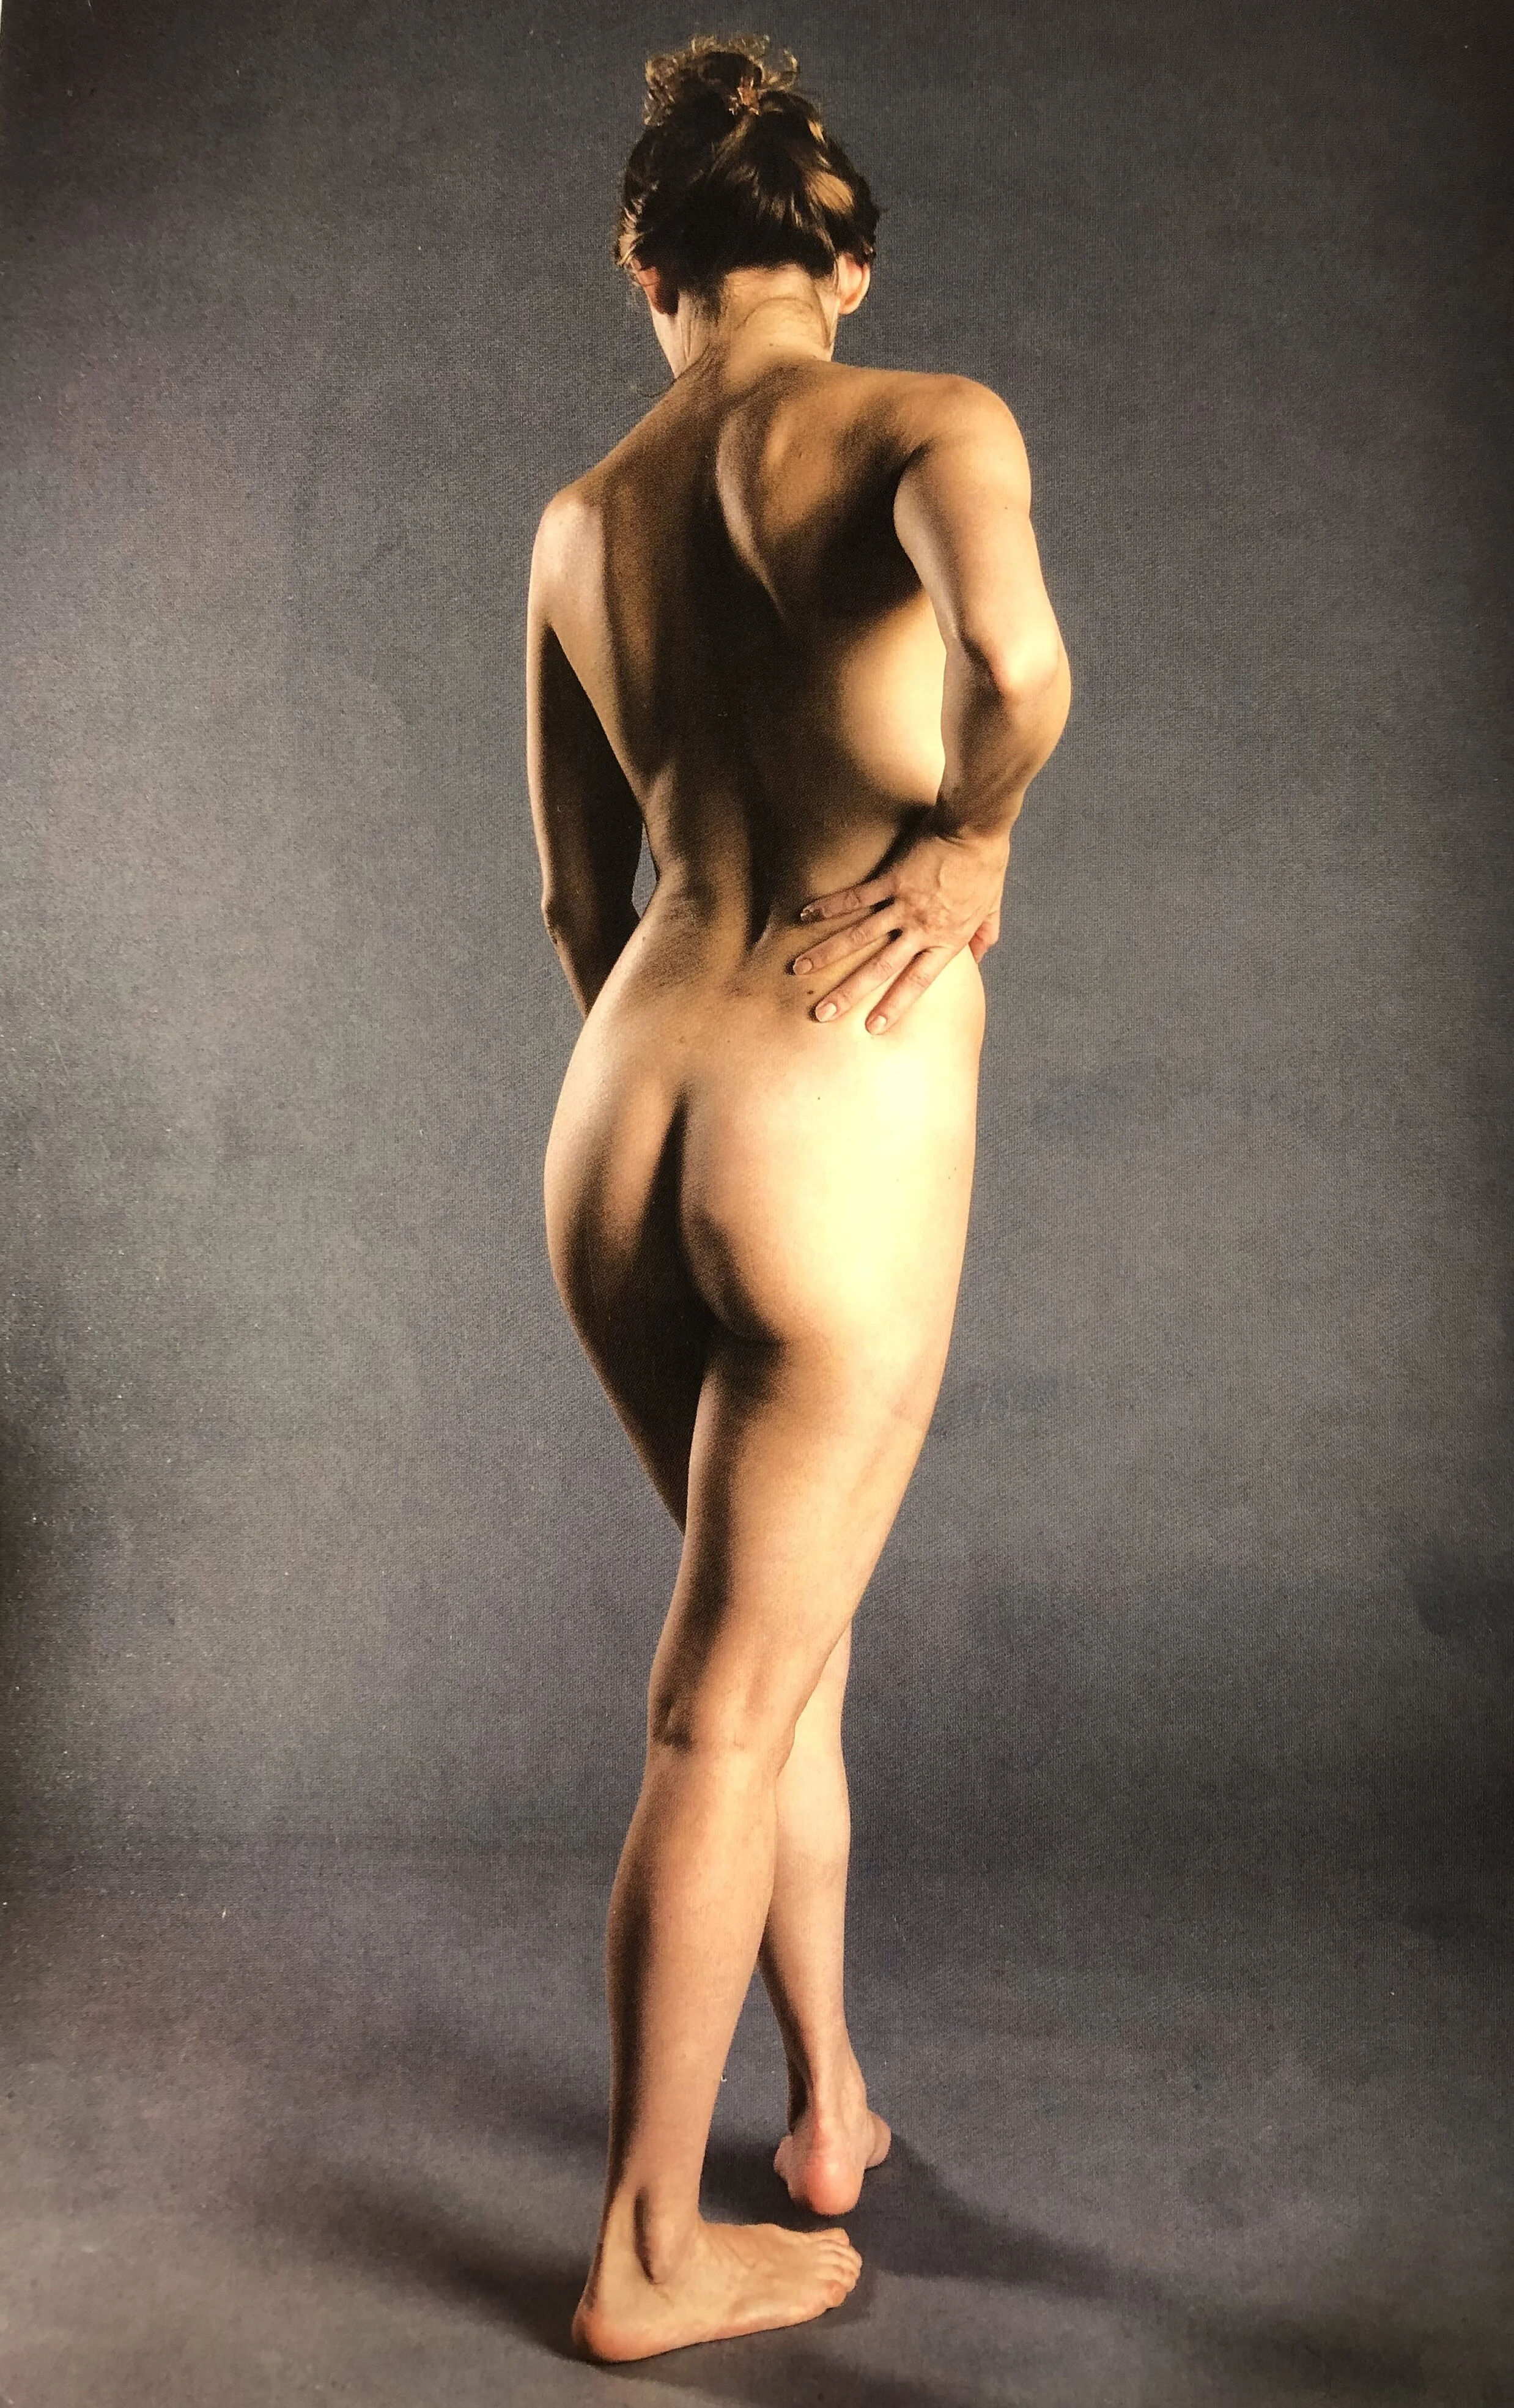
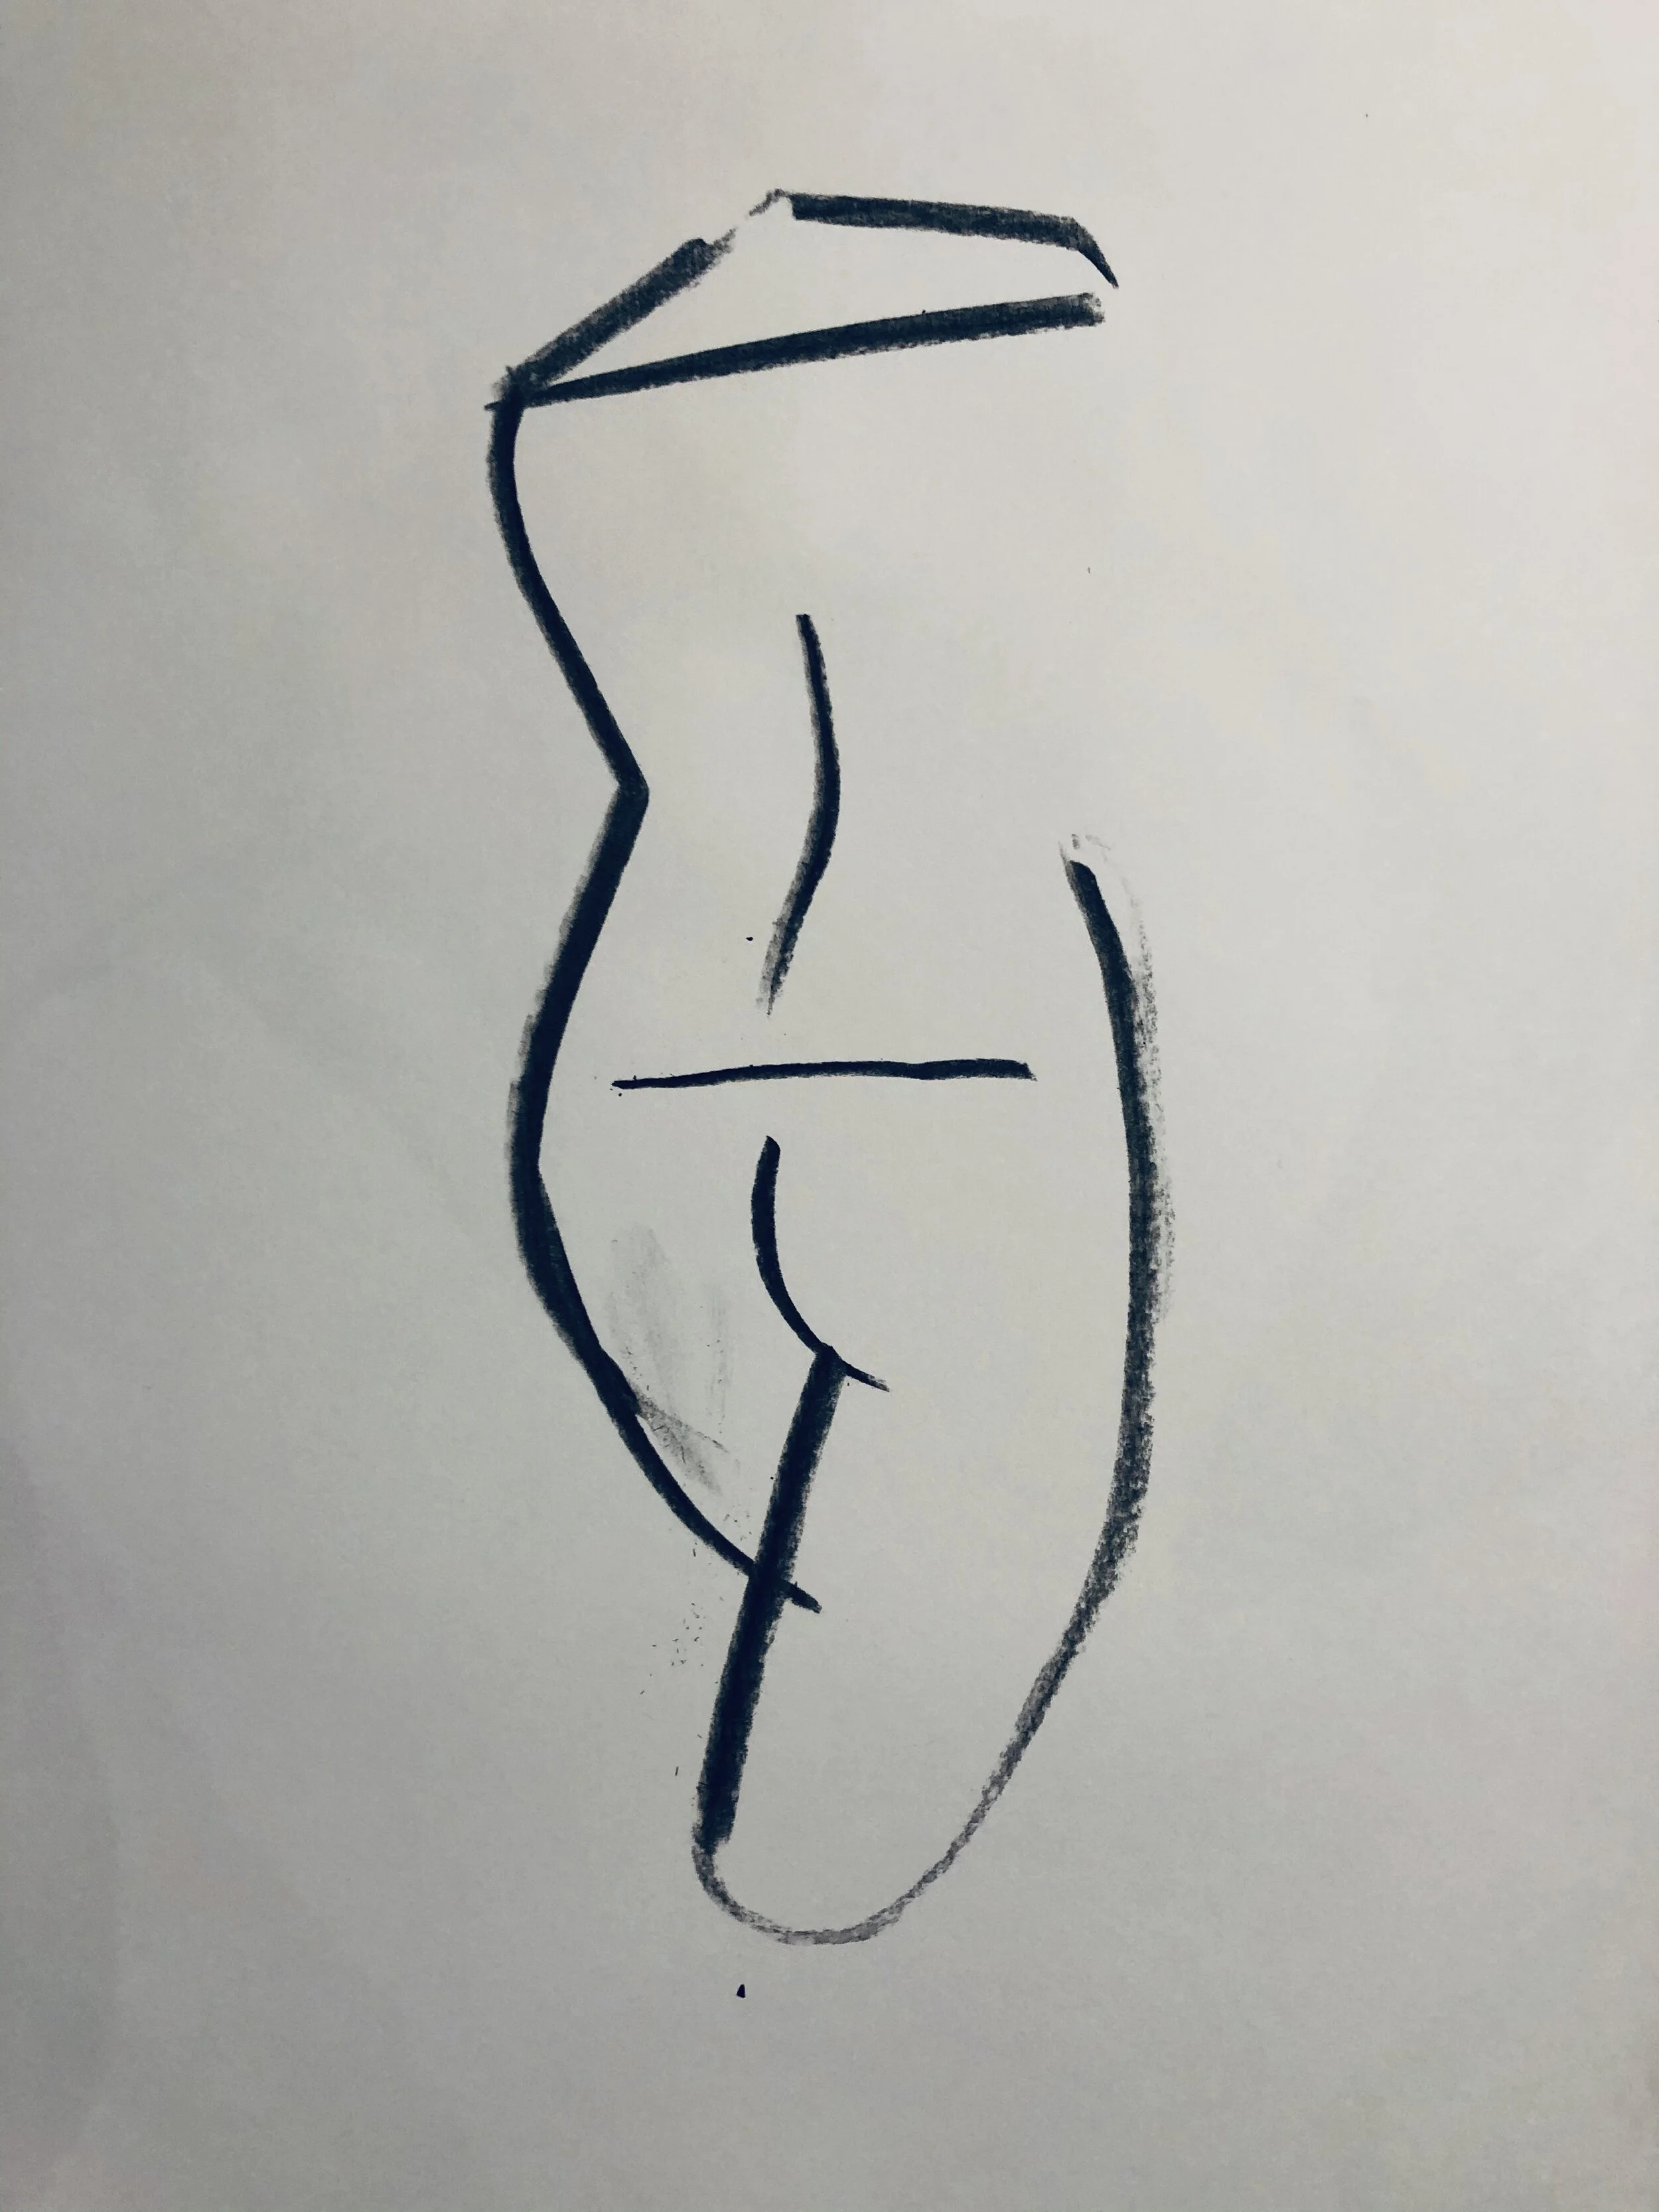
Sixth drawing pose
Today's pose may provide a bit more of a challenge. Remember to only ever draw what you see. Don't fill in extra length in the arms and legs that you know exist.
Sometimes the trick is to try to look at the body merely as a flat shape or a series of shapes without all the knowledge of what you know a human body to be. Also take note of the position of the head in this pose. Her shoulder line runs through the part in her face above the nose and just under the eye line.
Our suggested soundtrack for today is by Matthew Armitage https://open.spotify.com/artist/62kwFEojeNhSZRXz3DQ7l7?si=a84myyAsRUCrxkBFnm7KCQ
Reference image from 'The Nude Female Figure' by Mark Edward Smith
0 LIKES
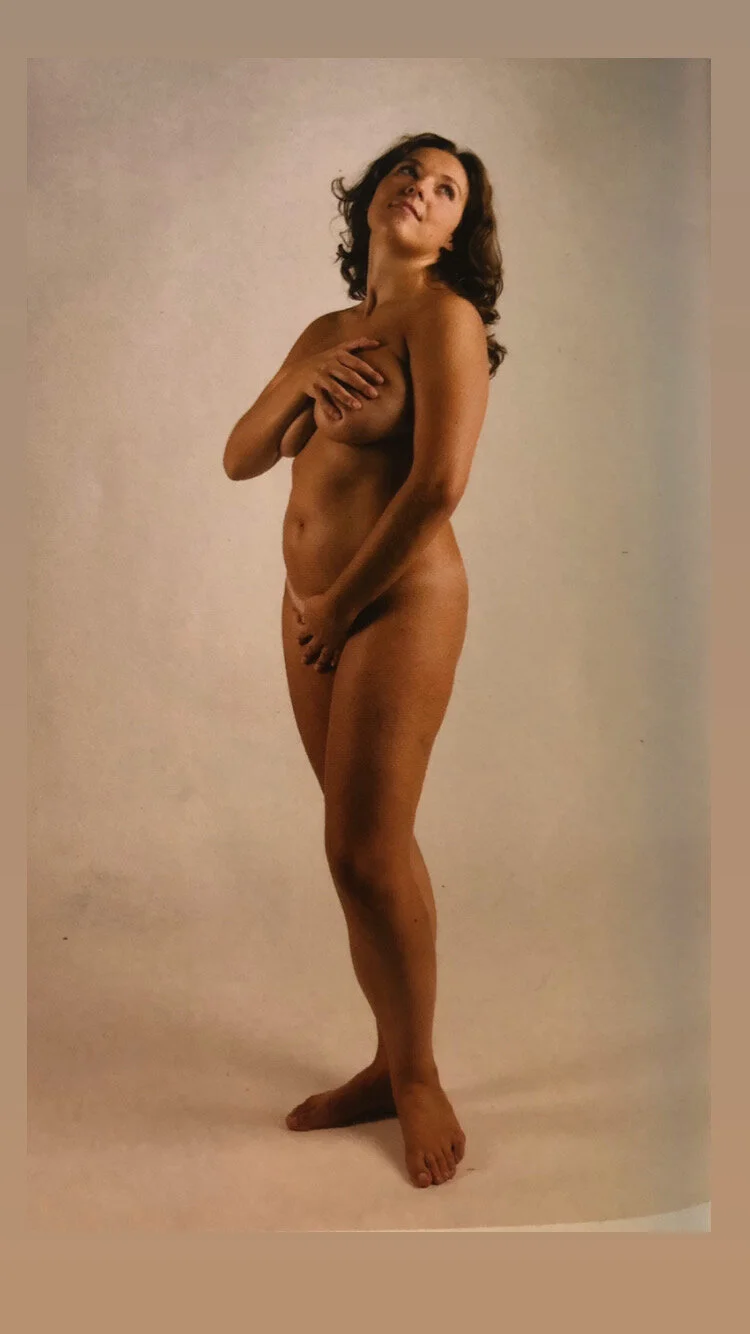
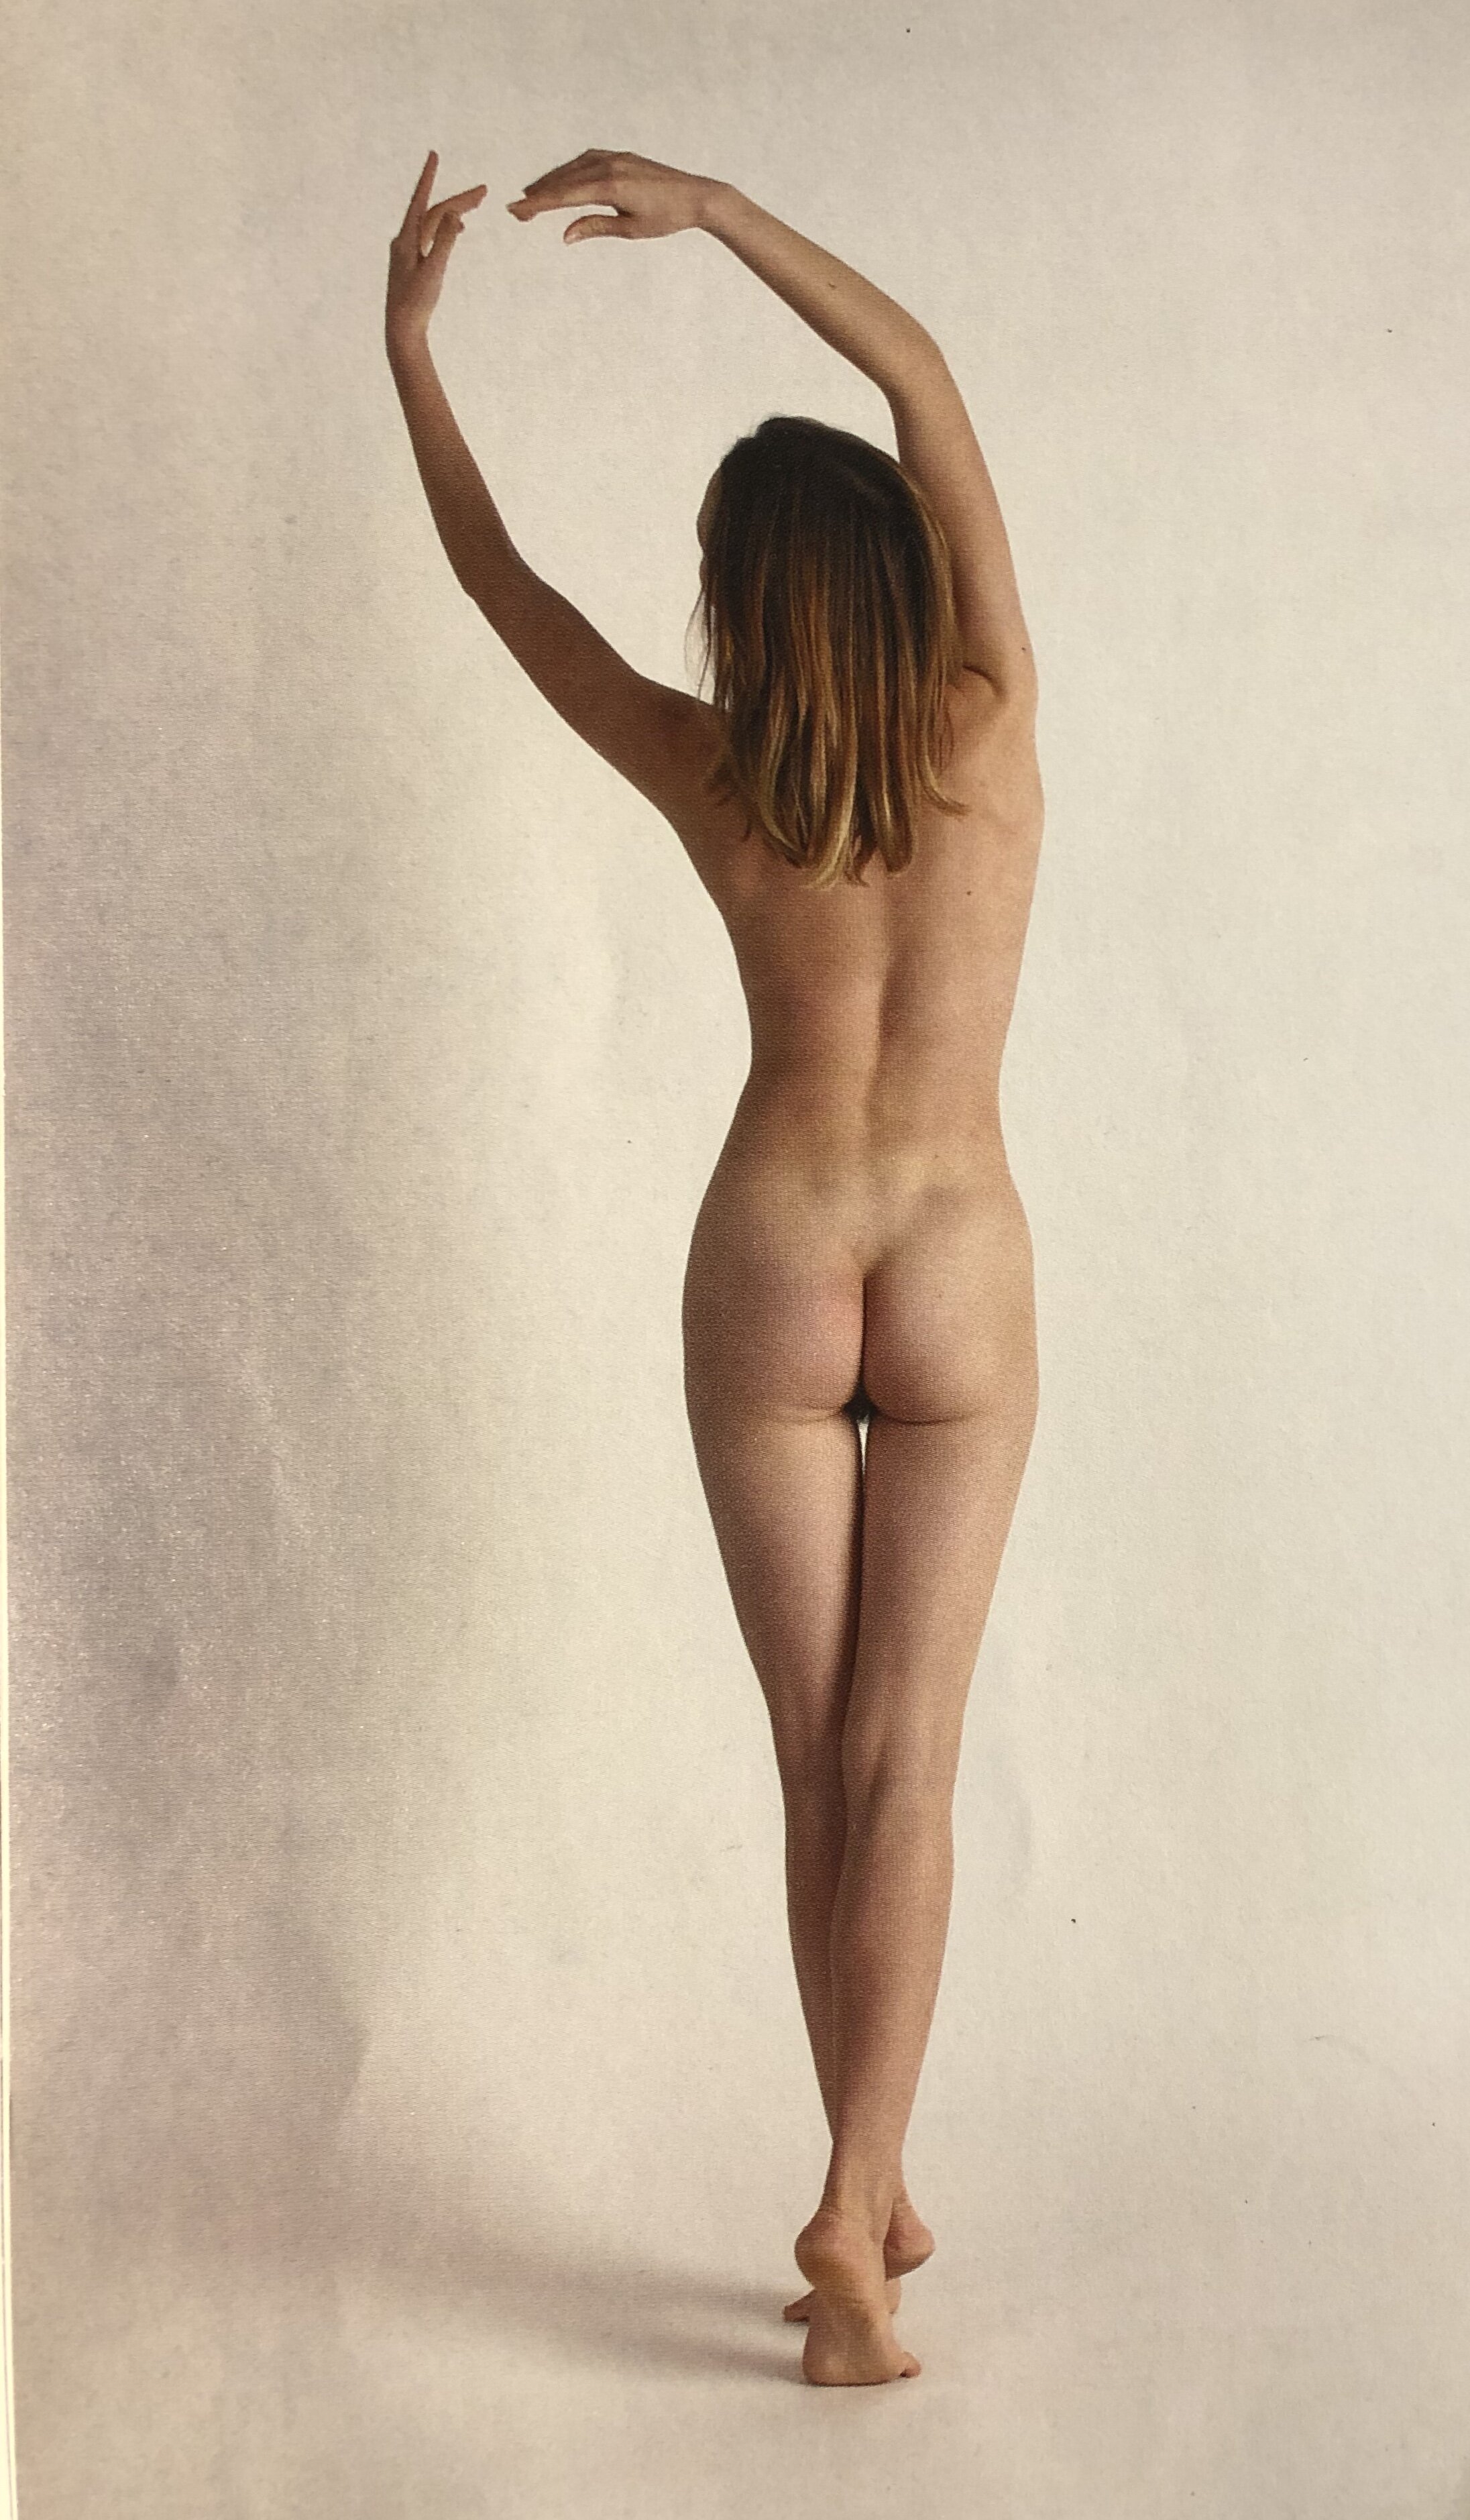
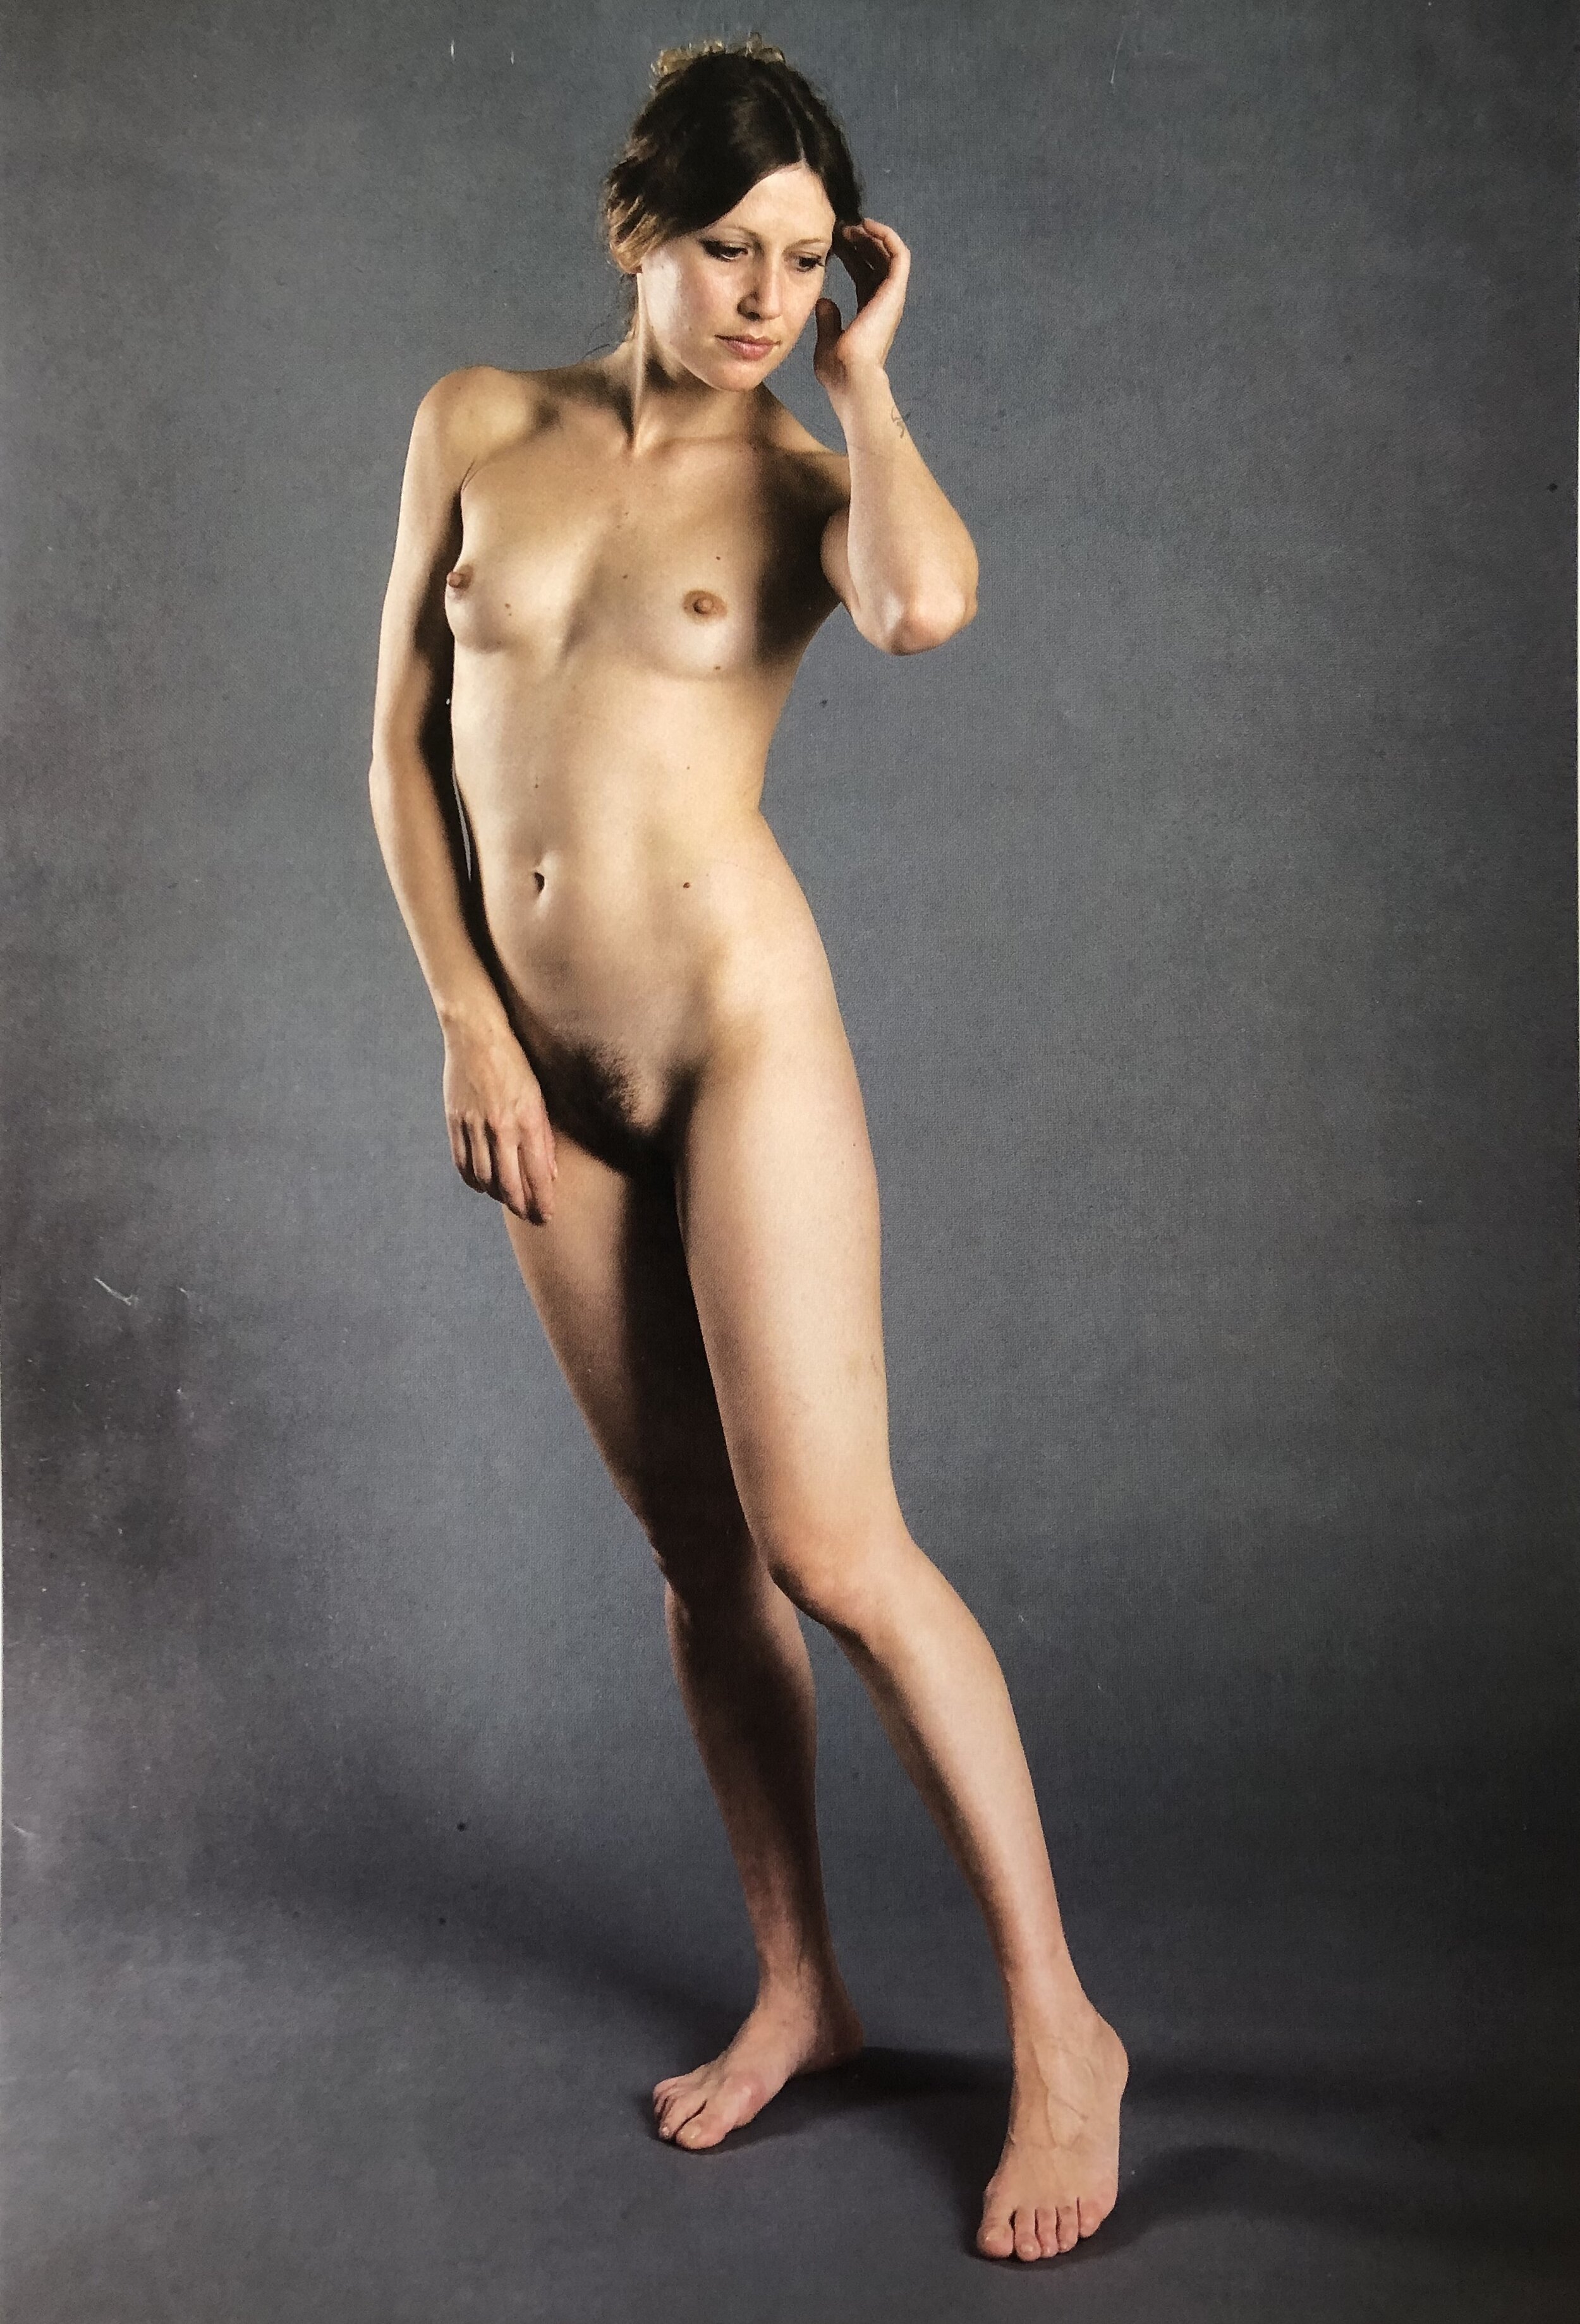
Fifth Drawing Pose
Today we have this beautiful standing pose. Take note of the torso, if one side is extended (the right) the other will always be contracted (the left). You could begin this drawing by sketching an angle line for the shoulders first and then the hips. Capturing the movement in the torso will help bring your drawing to life on the page. Scroll down to see an example.
Each week I will post one drawing technique, so make sure you scroll back through the images to find them. Next technique I will post on Wednesday.
The suggested soundtrack is by CC the Cat https://open.spotify.com/artist/4XpMHVDyR21OMAzcgIhE0M?si=KYuxiUhMTQ2o68cyjU45vw
Reference image from 'The Nude Female Figure' by Mark Edward Smith
0 LIKES
Shoulder and hip angle lines
Drawing your torso using those original lines as a guideline
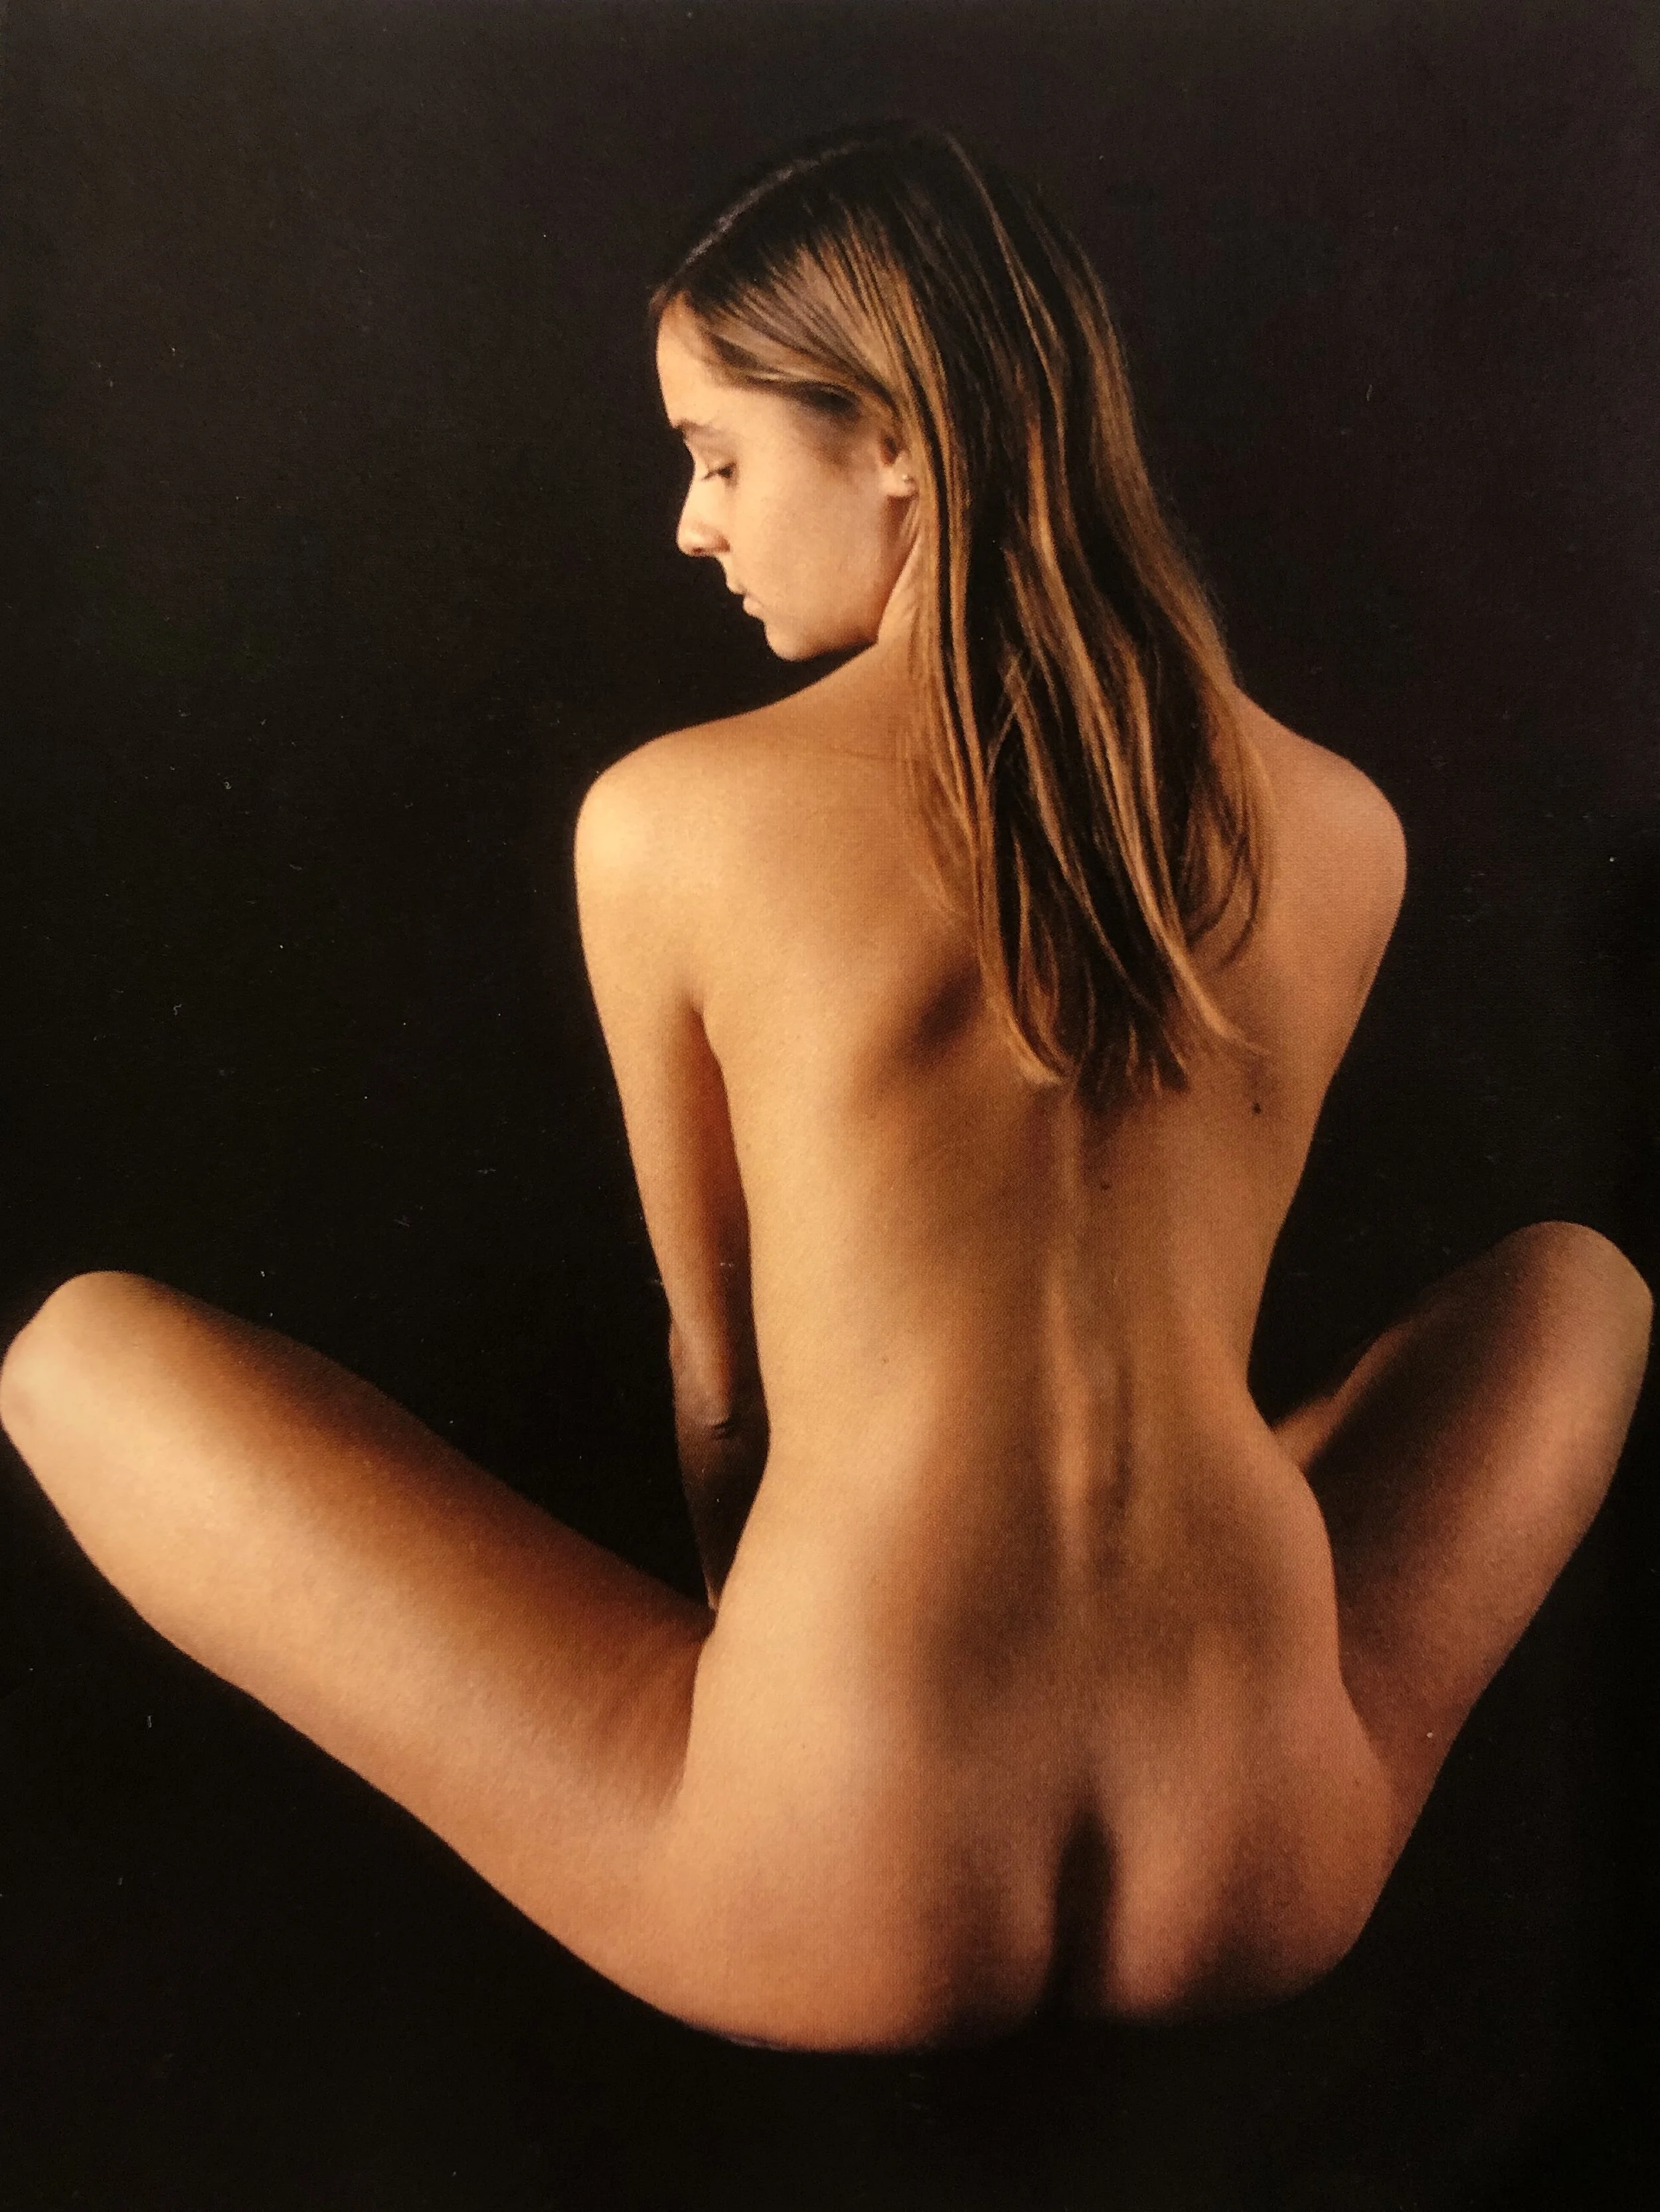
Fourth Drawing Pose
Reference image from 'The Nude Female Figure' by Mark Edward Smith
Third Drawing Pose
Today's pose is inspired by a little reminder to keep moving even if we're sitting inside most of the day. Nothing like a little dance to lift the spirits!
Try and apply yesterdays Negative space technique to this one too, particularly the shape between the arms. I'll often draw the shape first and then fill in the outer lines of the limbs after, so all you have to do is follow the contour of the original shape you made.
TIP: The model is standing on her toes so her legs are going to look longer and appear out of proportion.
Today's soundtrack is brought to you by Felicity Lawless. Make sure you check out Ouroboros and give drawing to that a go!
https://open.spotify.com/album/6ZN2XhTVZoMK0iv11hGmoR?si=a8HpY6W2RcC9goTEsmVv3w
Reference image from pg. 28 of 'The Nude Female Figure' by Mark Edward Smith
Second Drawing Pose
Here is todays pose! This one is a great example of negative space.
Here and there the poses will be accompanied with some drawing techniques. I consider these tools. For every tool you learn to use in your head, being it the way you look at the subject, then the way you observe the space around it, to the way you apply that knowledge to the paper, you will surely come to create comprehensive drawings of anything and everything. These tools apply to drawing all things!
The more you practice them the easier it gets, and eventually you may not even have to apply the tools onto paper but merely use them as a visual guide in your mind.
Before you start drawing the figure first try this exercise. The reason why we do this exercise is that it helps us to gain an understanding of proportion and distance between body parts. By looking outside of the body (which can at times look extremely complicated) and simplifying what we see into shapes. Scroll down for a step by step explanation of how to use and see negative space.
Todays soundtrack is by Alisha Todd - @thealishatodd
https://soundcloud.com/alisha-todd/sets/facebook-playlist?fbclid=IwAR2y5LalWvoZoNS9M0ebPc5YpuwEKzyjOy3ae2fnvrAwA5HL3EjvuKd4juo
Reference image from p.53 'The nude female figure' By Mark Edward Smith
Step 1
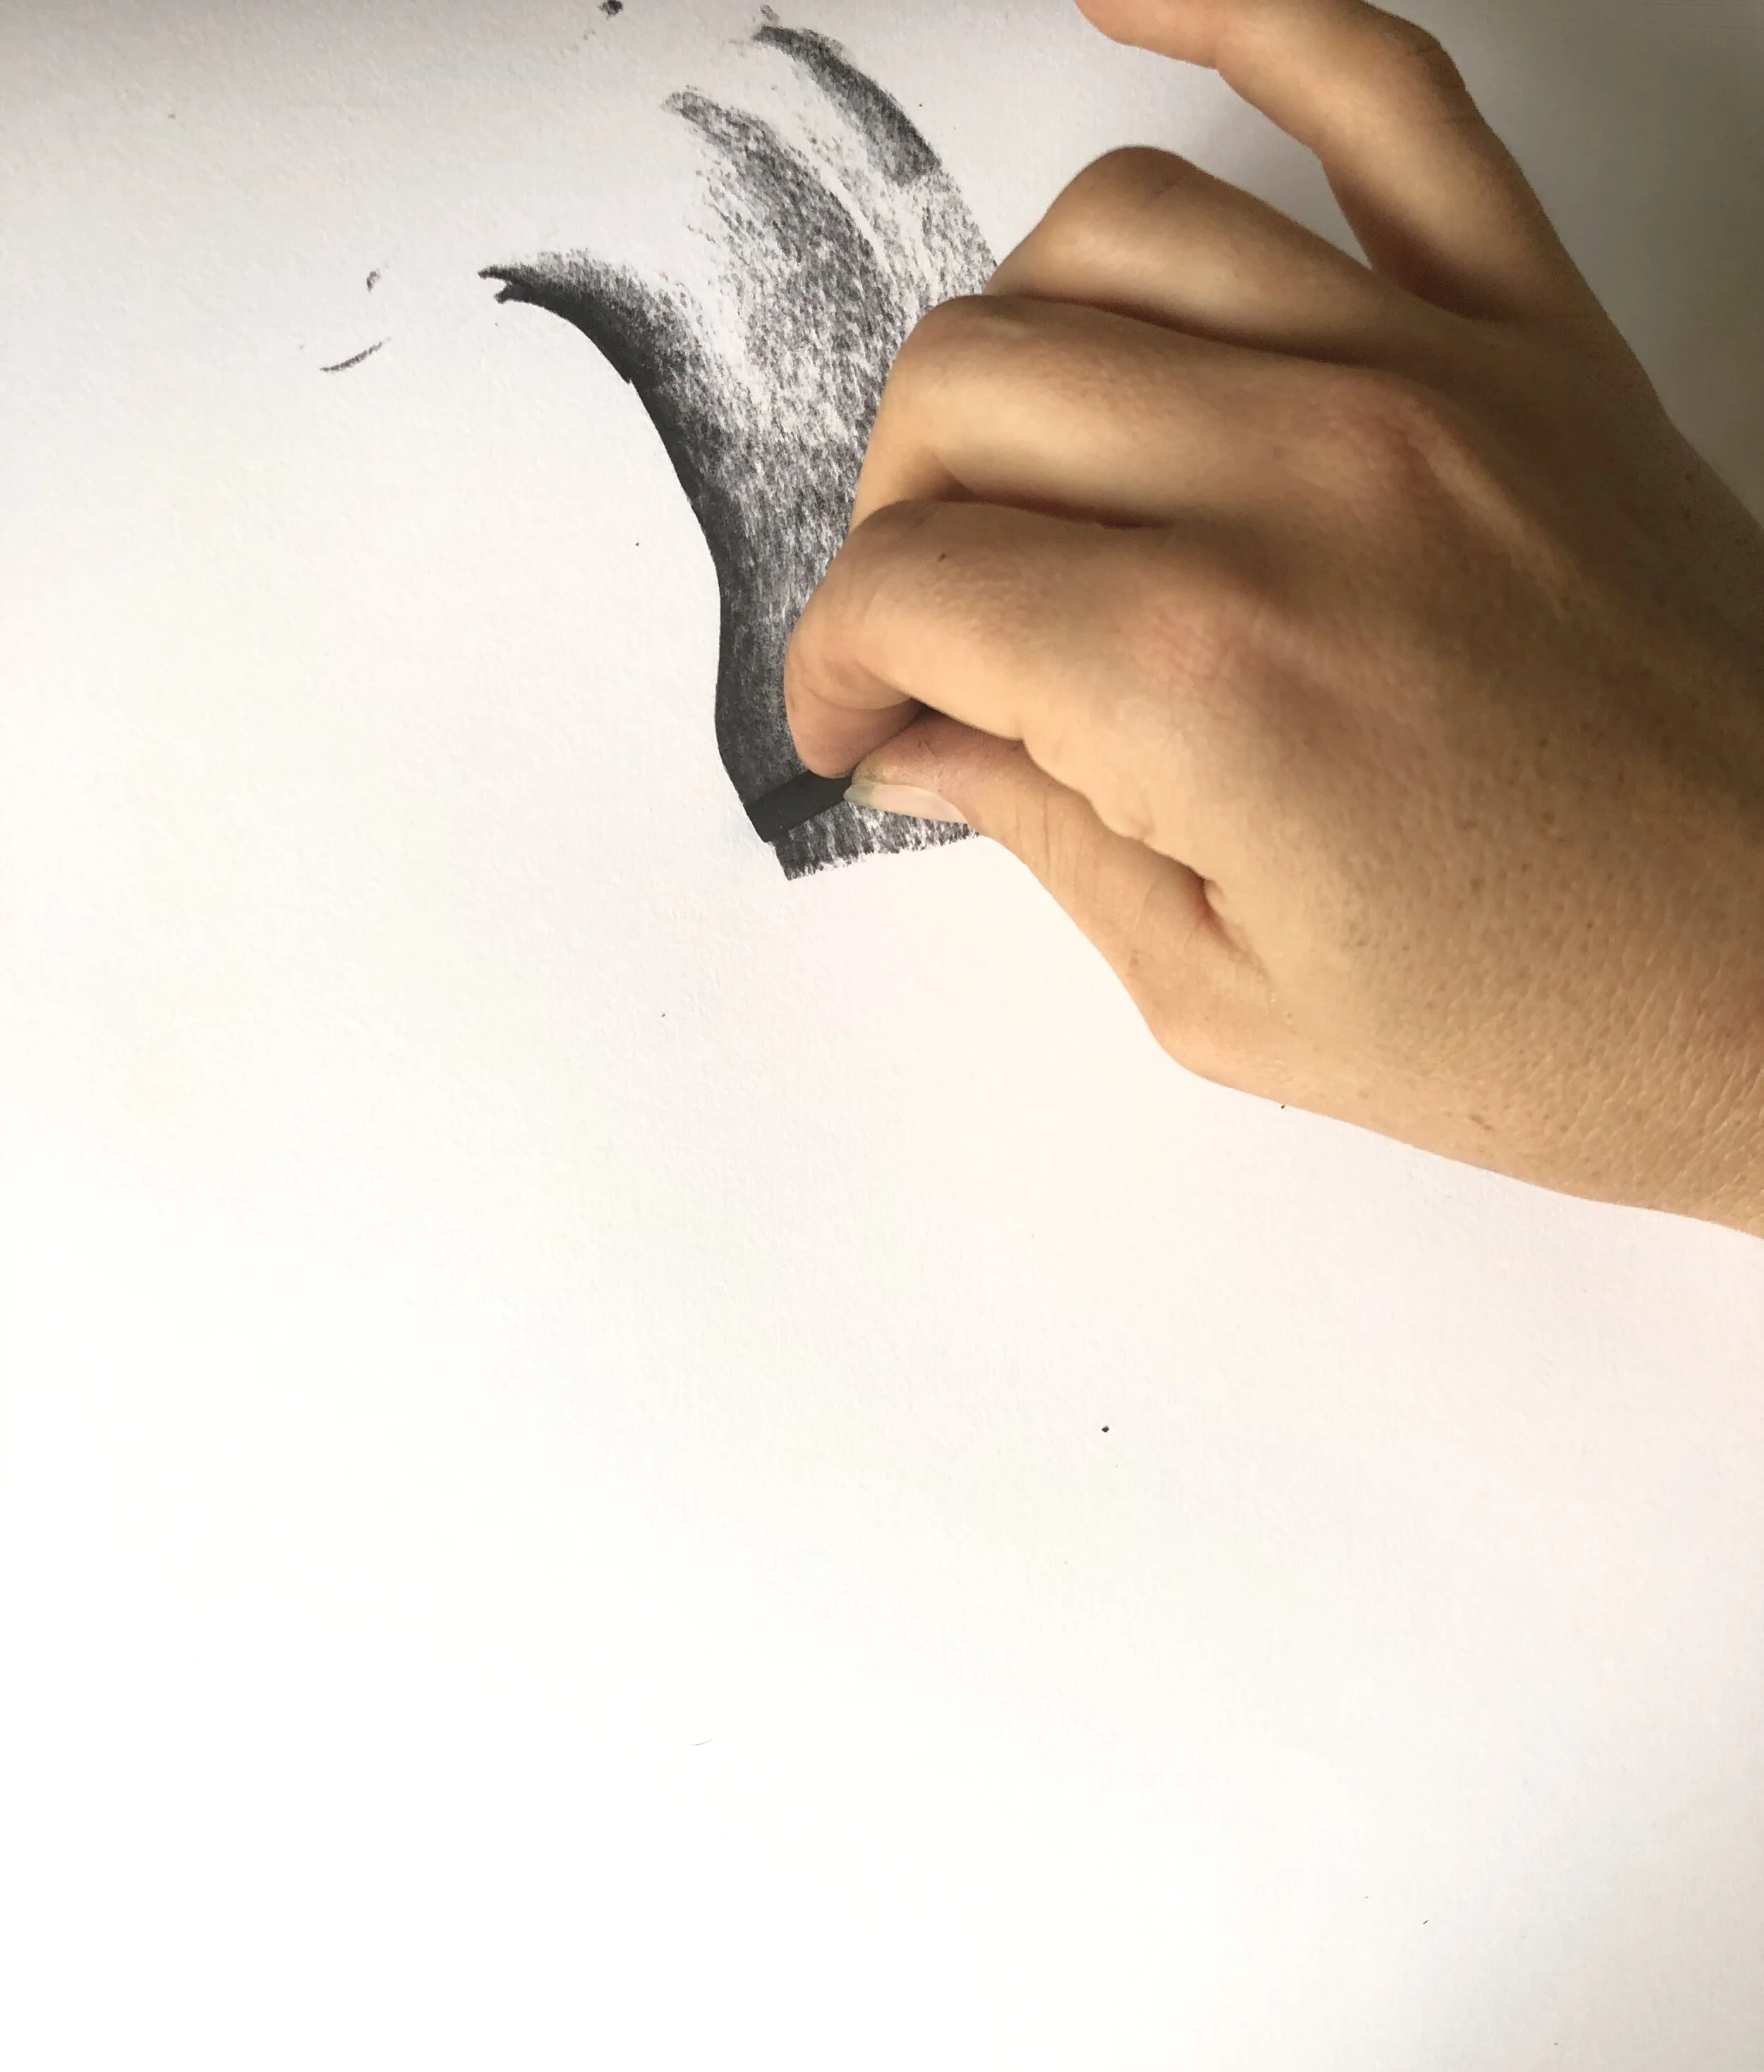
Turn your charcoal on its side to lay flat against the paper. If you don't have charcoal you can use the pencil tip on its side or find a crayon.
Step 2
Follow the outline of the body as you start to create a white silhouette by filling the negative space.
Step 3
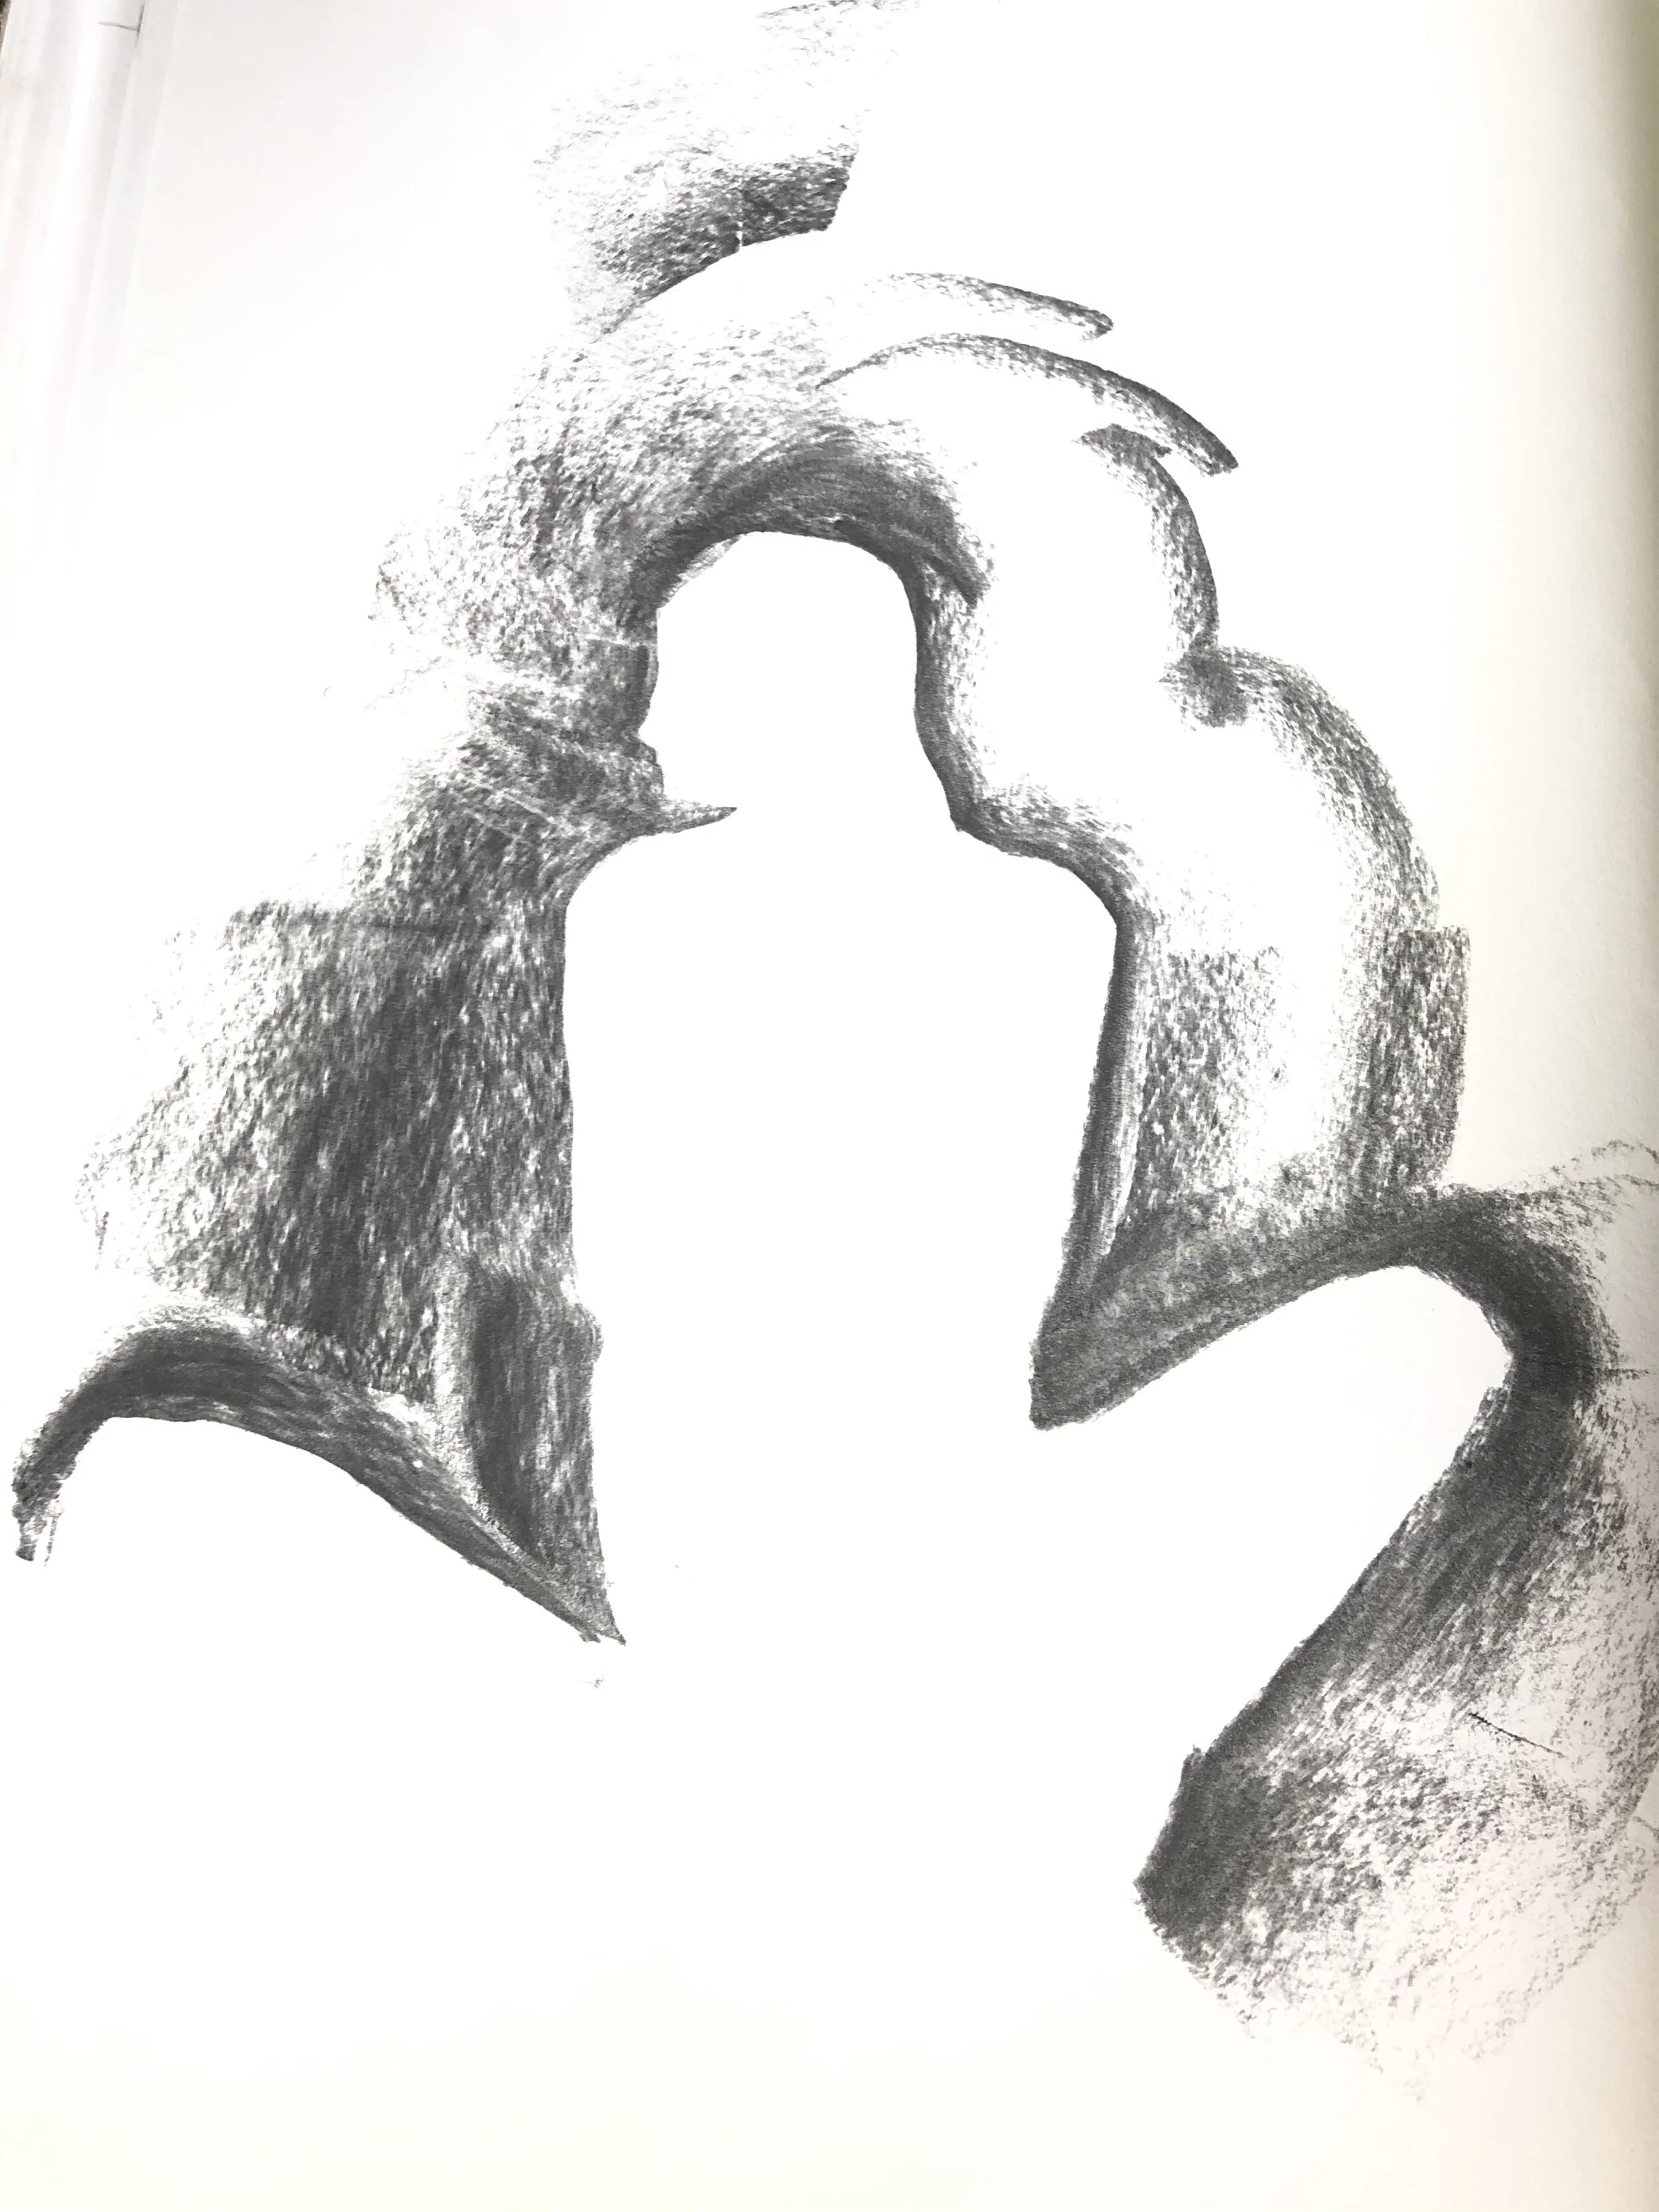
Once you have made your way around the entire figure you should end up with a picture that somewhat looks like this. Don't be deterred if you have something entirely different! Like all things, it takes practice. Keep scrolling down for the breakdown
The Breakdown
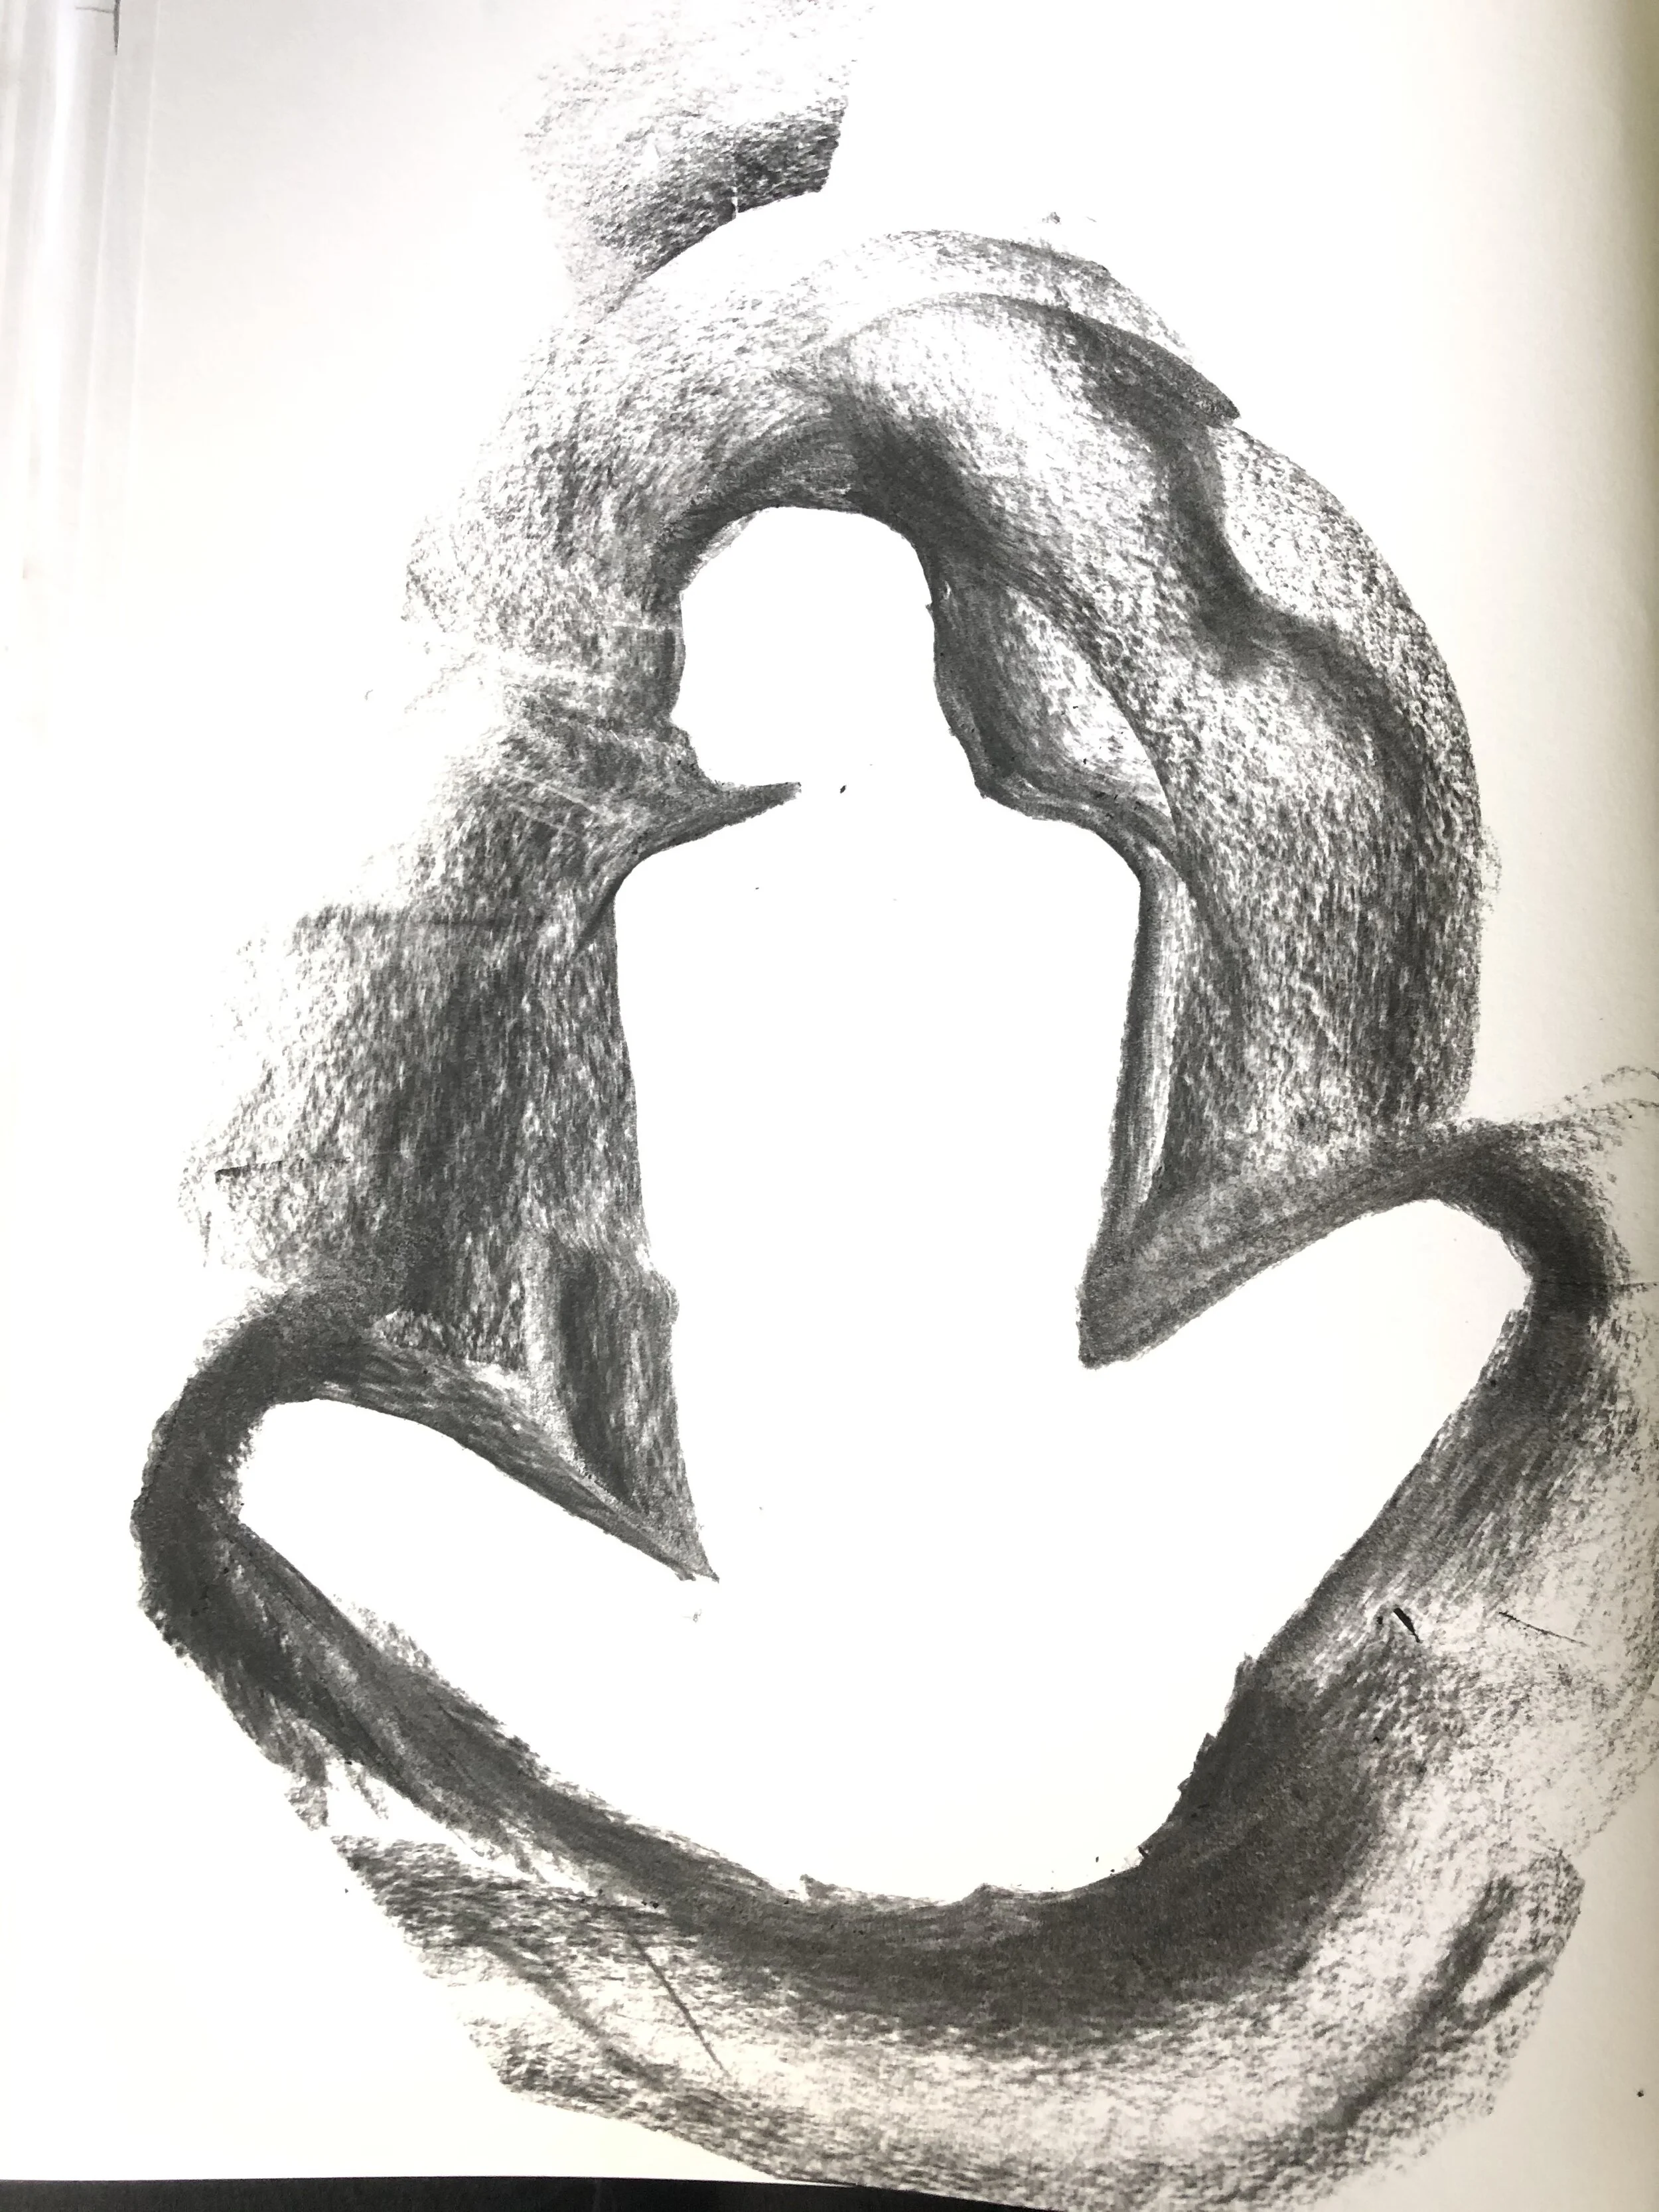
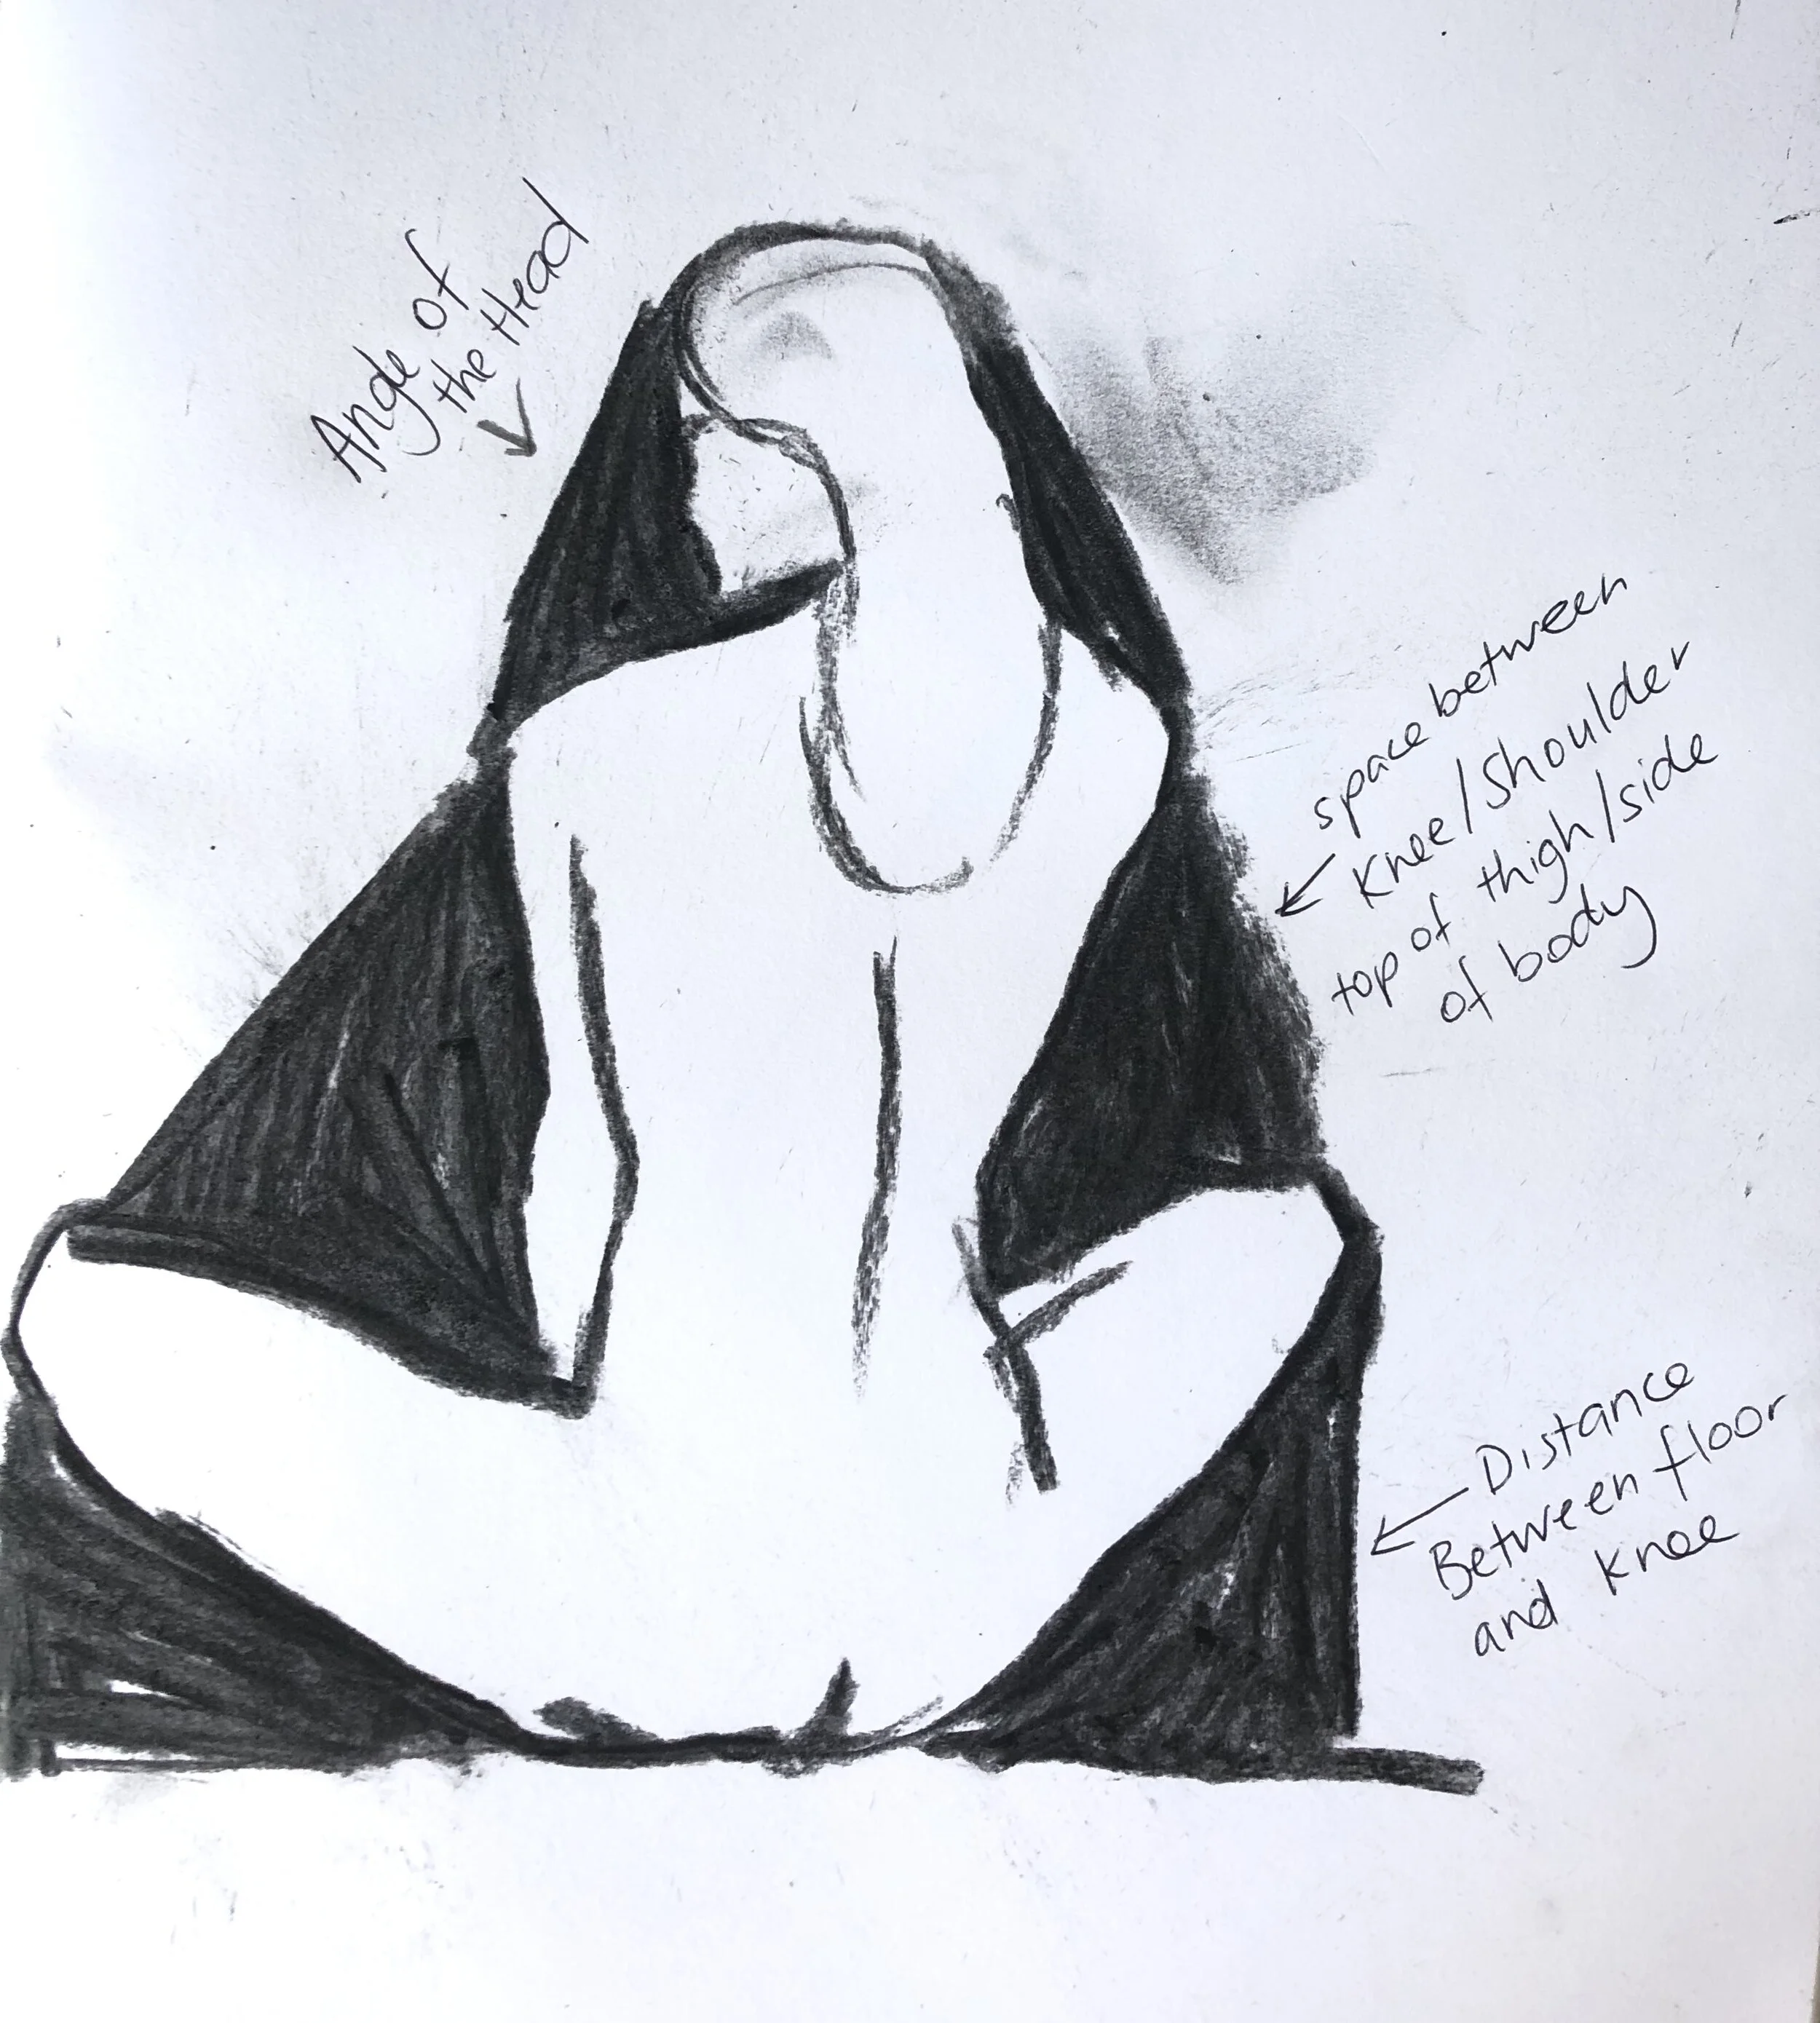
So here the drawing is broken into shapes. This is another way to help you apply distance and proportion to your drawing. Everyone sees things differently, some people work tonally, some are line people and some people work best with shapes! By breaking everything down into shapes you can essentially build your drawing piece by piece instead of trying to tackle the complicated mass of angles, arms and legs.
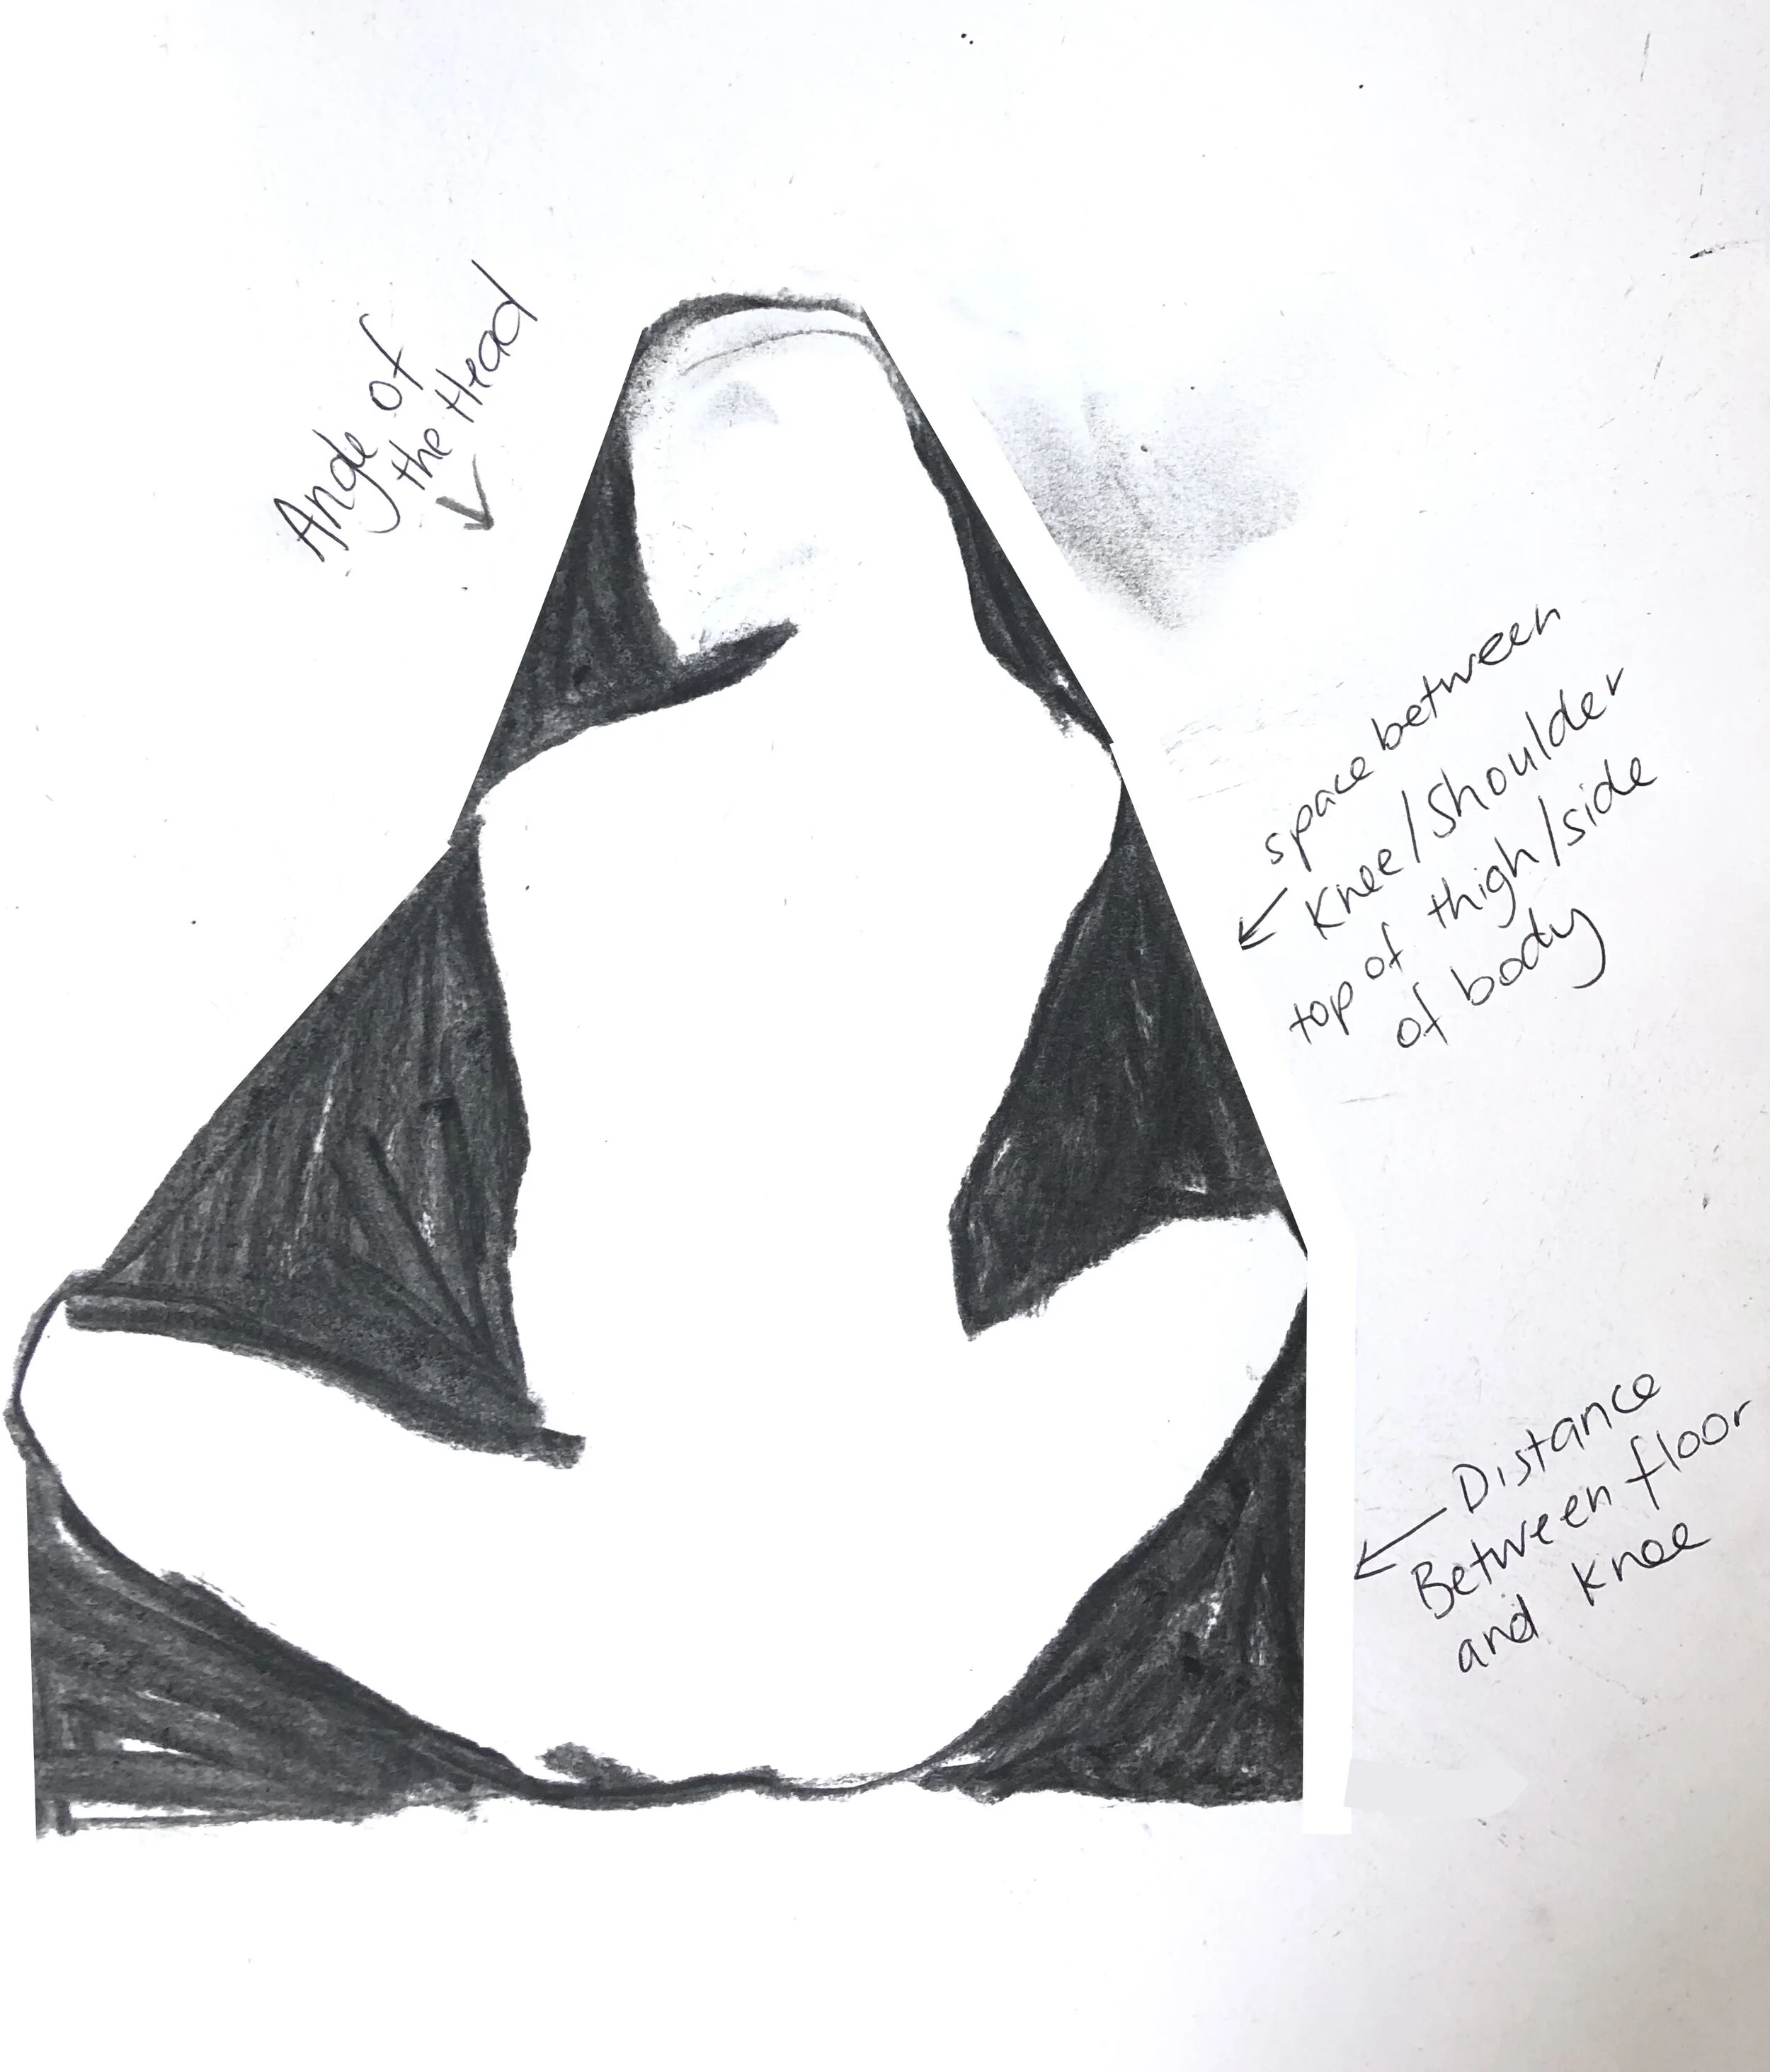
When you are attempting this technique imagine drawing a line between the right shoulder and the top of the right knee. And then follow the contour of the body between those two points, and you end up with a shape. That is the exact shape you draw. Apply this again to the spaces between the knees and the floor, the left leg and shoulder, the angle of the face to the shoulder etc. Until you make your way around the body.
Negative Space
There you have it, a little intro into using negative space. You can use this technique if you notice a lot of space between the limbs in the pose or particularly awkward angles. Attempt to do this first, and then start on a new page and sketch the pose. Or even use your negative space sketch to create an interesting drawing and simply add to it. The more studies you do of each pose the better you will get at drawing it.
First Drawing Pose
Today we have chosen a standing pose This will be a great pose to work on your proportion. The model naturally has longer legs so don't let that fool you into getting carried away with the leg length.
A little tip is to mark out on the page where you think the head, shoulders, hips, knees and feet would be. Compare your markings to the image until you feel happy with your proportions. Planning is important so that you don't waste time diving and in and committing to detail before you've figured out where the hell everything is meant to go!
You may also find it easier to print the image of and use it as reference material instead of trying to draw from a screen!
Our Featured artist for this pose is Jackson James Smith, click this link to find his music also available on itunes - https://open.spotify.com/artist/4wZrNimuRC6ba5W9eJGv8x?si=7KtqJZ65QlOmlYfSoly4ww
Happy drawing and don't forget to send us your sketches :)
Today's Pose is from page 13 of 'The Nude Female Figure' by Mark Edward Smith.
Here's how we are going to tackle Isolation together...
It has been proven that drawing produces positive brain chemistry like Serotonin, Endorphins, Dopamine, and Norepinephrine. Which we could all use a lot more of right now!
Each day we are going to post a nude pose from a fantastic book called 'The Nude Female Figure' by Mark Edward Smith. Each pose will be accompanied by a link to a local or international musician who has played at one of our sessions or who was booked to play. You can choose to take as little or as much time as you wish on these drawings, but try and stick to listening to the same artist for the entire duration of the sketch.
When you've completed your drawing post it on social media and tag the musician and us (@life_drawing_sessions) so we can share your creation. Alternatively you could email the work through to info@lifedrawingsessions.com.au. The musicians handle will be posted in our daily stories too so you can use that link to help share their music!
This project is designed to encourage, inspire and to focus on something other than the craziness that surrounds us right now.
The first pose and musician will be in our next post.
So get yourself a piece of paper, pick up a drawing utensil, and enjoy!
how to draw body positions
Source: https://www.lifedrawingsessions.com.au/posesforhome
Posted by: morganfroach.blogspot.com
0 Response to "how to draw body positions"
Post a Comment